Studio 6 Nodes
This is a test This is a test too.
Nodes, the building blocks of all call flows in Inference Studio. On this page you will find a high level overview of each node type in Inference Studio.
Biometrics Enrol
Biometrics in Inference Studio is used as a password replacement tool by first recording a voice print and then comparing a callers voice to the saved print.
The Biometrics Enrol node is the first step in using biometrics where you are able to generate a voice print with a unique ID. The voice print is created by recording three (3) samples of a caller speaking a particular phrase.
- From the Node tab, provide a new Node Name. We will call ours bio_enrol.
- By default, the utterance is saved as an audio file on the Studio platform. The audio file is converted to a voiceprint which is also saved. It is recommended to save the utterance during the early stages of implementation to assist with tuning and resolving errors. The utterance is not saved if you Disable Audio File Saving. The voiceprint is saved.
- From the First Prompt tab, select an existing prompt or select == NEW PROMPT ==
- Provide a Prompt Name. We will call ours first_utterance and under TTS we will provide the text 'Say your name, followed by the pound key' then select Add.

- Select the Second Prompt tab and select == NEW PROMPT==. Provide the text for the second utterance. We will provide the TTS text 'Say your name again, followed by the pound key'. Select Add.
- Select the Third Prompt tab, choose == NEW PROMPT == and provide text for the final utterance. We will provide the text 'Say your name one last time, followed by the pound key'. Select Add.
- Select the Event Handlers tab and select or create a No Input Event Handler. The Event Handler will trigger if no input is provided by the caller.
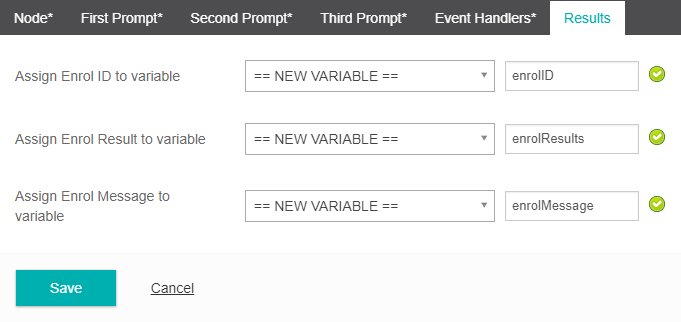
- Select the Results tab. This is where you select which variables to store the enrollment details into. We will simply create a new variable for each field.
- Select Save.
Biometrics Verify
Biometrics Verify is the process in which a caller speaks a particular phrase and their voice is compared to the voice signature that was captured during the Biometric Enrol process.
- From the Node tab provdie a new Node Name.
- By default, the utterance is saved as an audio file on the Studio platform. The audio file is converted to a voiceprint which is also saved. It is recommended to save the utterance during the early stages of implementation to assist with tuning and resolving errors. The utterance is not saved if you Disable Audio File Saving. The voiceprint is saved.
- Select the Prompt tab and either Select or Create a New Prompt. We will create the prompt "Now let's verify your enrolment, please say your name after the beep and then press hash". Add the prompt.
- Select the Event Handlers tab and select or create a No Input Event Handler. The Event Handler will trigger if no input is provided by the caller.
- Select the Parameters tab. Here you will need to select the Enrol ID variable you created during the Biometric Enrol process. This way it can verify which caller's ID you want to compare voice signatures for.
- Select the Results tab. This is where you select which variables to store the verification details into. We will simply create a new variable for each field.
- Select Save.
Biometrics Delete
Biometrics delete is a maintenance capability that allows you to delete voice signatures that are no longer relevant e.g. an employee leaves your organisation.
- From the Node tab provide a new Node Name.
- Select the Parameters tab. Select the variable where you are storing your biometric enrollment ID's.
- Select the Results tab. Here you can assign a Delete result and Delete message to existing or new variable.
- Select Save.
Bridge Transfer
The Bridge Transfer node allows you to transfer a call to any valid telephone number. This is known as a bridge transfer because even when a call is transferred to a service it remains in the current call loop until the call is terminated. This includes all talk time with the caller at the transfer telephone number. Unsuccessful transfers will trigger the configured Event Handler.
- From the Node tab, assign a new Node Name.
- Under the Phone Number section you can provide a phone number or retrieve it from a stored variable via the Expression Builder. We will transfer our call to the number 04085555.
- Under the Event Handlers tab, provide an event handler from the dropdown menu. You can also create a new event handler by selecting == NEW EVENT HANDLER ==, and providing a new event handler name. An Event Handler is required.
- From the Settings tab you are able to assign a custom ANI and Display Name. By providing an ANI the transfer will then act as a consultation transfer.
- From the Music on hold section you can include an audio track via the Upload button. The maximum file size is 1MB.
- Select Save.
When using a Bridge transfer the Inference platform remains in the call loop for the duration of the call. This includes talk time with the caller at the transfer telephone number. For this reason, bridge transfers should be used cautiously.
BW ScreenPop Transfer
TIP
This node is only available to customers who are taking their carriage services from BroadSoft based service providers. Only BroadWorks SIP trunks that meet special requirements are able to support ScreenPop. You will need to contact your service provider to see if your Studio account supports Screenpop. If you are/use a non-Broadsoft based service provider you can use the standard Screenpop node which offers the same functionality.
The BW ScreenPop Transfer node allows you to display relevant caller and account information ("IVR attached data") during a call transfer. The parameters specified within the node are saved to a temporary data store against the specified ANI. The call is then transferred to the specified destination with ANI overridden as specified, for instance the original caller ANI. The BroadWorks call center client must be configured to open a web browser with URL configured to load from the temporary data store using the specified ANI. Contact Inference Support for the URL for each region.
- From the Node tab, provide a new Node Name.
- Provide a transfer Phone Number or a variable via the Expression Builder (e.g. a BroadWorks Call Center Number).
- Under the Event Handlers tab, provide Busy or No Answer Event Handler from the dropdown menu. You can also create a new event handler by selecting == NEW EVENT HANDLER ==, and providing a new event handler name.
- From the Screenpop Settings tab, you will need to specify the Parameters you want to include in the Screenpop. To do this you will need to provide a Key and Value (Expression) pair for each parameter. You will also need to provide a Display Label for each parameter which is how each parameter will be titled in the screenpop.
- Select the ANI via the Expression Builder. (The ANI is the current caller's phone number)
- From the Music on hold section you can include an audio track via the Upload button. The maximum file size is 1MB. This will be played to the caller while the transferred call is progressing to the connected state.
- Select Save.
Calendar
The Calendar node is similar to the Day Time node in that it allows a call to be directed based on day/time parameters although the Calendar node allows more detailed conditions such as year, month and time, as well as custom repetition conditions.
- From the Node tab, provide a new Node Name. We will call ours xmas_day.
- From the Settings tab, select the Holiday Schedule you would like to use. If you need to create a new Holiday Schedule you will need to set this under the studio GLOBAL settings.
- Under the If Business Hours Goto Node you will need to select which node you want the call to be directed to during normal business hours. i.e. typical non-holiday hours. We will direct ours to the main_menu node.
- Under the Otherwise Goto Node you will need to select which node the call will be directed to outside of business hours.
Cisco Spark

Studio 5.3
The Cisco Spark node has been deprecated as of Studio 5.3The Cisco Spark node provides the ability to post messages to a Cisco Spark room, as part of the call flow. You can create new rooms, retrieve messages from a specific room and play them back to the caller.
Insert the Cisco Spark node into your call flow and configure it as shown. The Cisco Spark node has a single settings tab that will need configuration before Cisco Spark can be used.
To enable integration with Cisco Spark, you will need to obtain an 'Access Token' from Cisco. See this link for more information https://developer.ciscospark.com/getting-started.html
Enter the 'Cisco Spark' URL
Select the HTTP method that you will use to pass parameters to Cisco Spark API
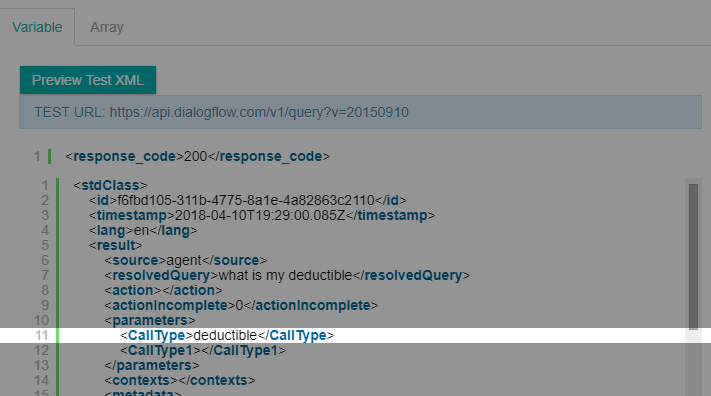
Enter the required Cisco Spark parameters. See this link for more information on API requirements https://developer.ciscospark.com/getting-started.html Use the 'Preview Test XML' to test your parameters against the Cisco Spark API
Choose a retrieved value from the 'Preview Test XML' preview window, or specify yhe XPath of the XML value that you would like to retrieve. Create a new variable or assign to an existing variable Click Add Return Value to assign the variable.
Cloud Speech-to-Text
Studio 6.5
Phrase hints in the Cloud Speech-to-Text node now supports the use of variables.Studio 6.4
From Studio 6.4 onwards you can now save the raw verbatim audio as an audio file.Studio 6.10
The Cloud Speech-to-Text node is available in Studio 6.0+The Cloud Speech-to-Text node uses the Google Cloud Speech-to-Text recognition technology to convert a caller's audio responses into text in real-time.
Node
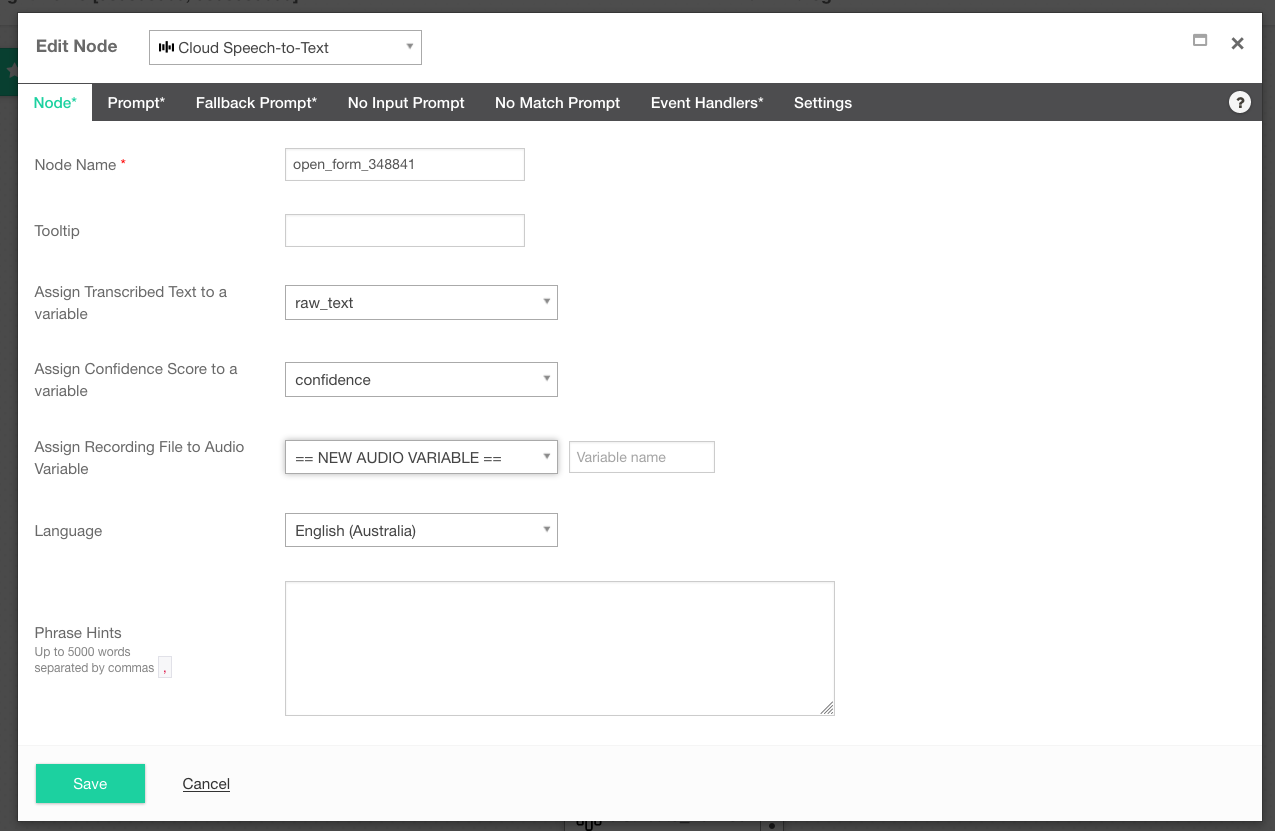
- From the Node tab provide a Node Name.
- From the Assign Transcribed Text to a variable dropdown, select an existing or new variable. This is the variable that will store the caller's transcribed responses.
- From the Assign Confidence Score to a variable dropdown, select an existing or new variable. This is the variable that will store the confidence level (as percentage in decimal format) associated with the transcribed text. This is an optional selection which allows you further flexbility to ignore transcriptions with a low confidence for example.
- Select a Language or leave it set the platform default.
Prompt
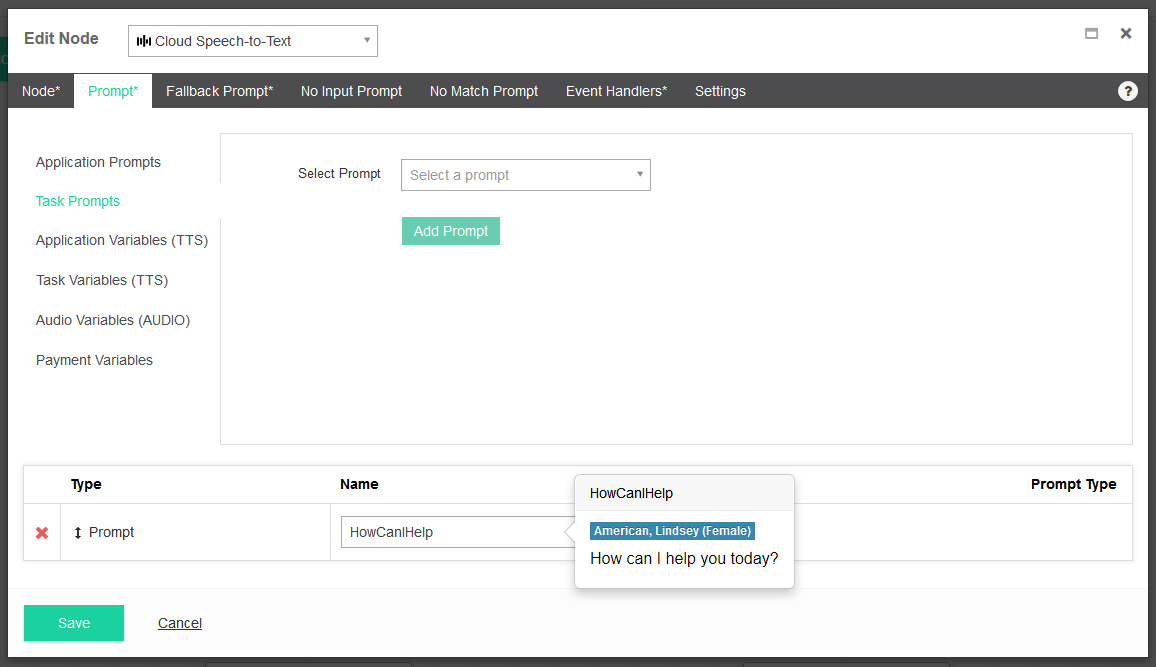
- Next, click on the Prompt tab. This tab allows you to configure the initial prompt that you want to play. In the Select Prompt drop down list, select == NEW PROMPT==.
- You will be presented with the "Add Task Prompt" interface. Enter a name for the prompt. We will call our prompt - HowCanIHelp. Leave the default values for Language and Voice columns. In the TTS column we will enter the following text for our prompt - How can I help you today? Click on the "Add" button to add the prompt. You will be returned to the "Edit Node" interface. Click on the "Add Prompt" button to add this prompt as the main prompt for the menu node.
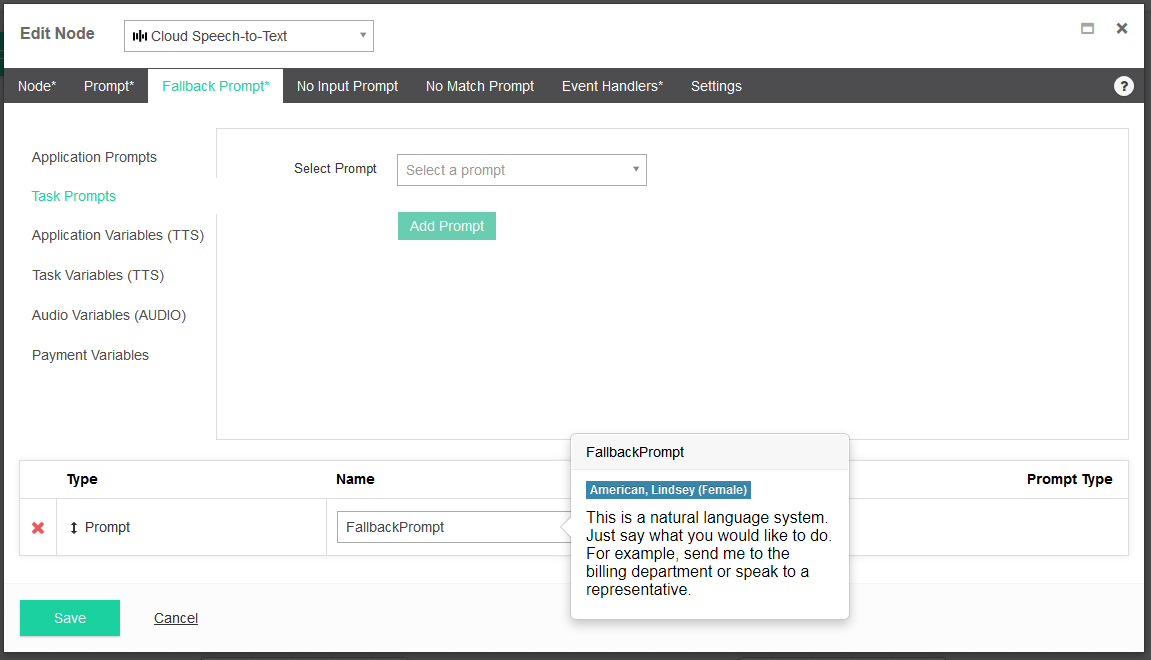
Fallback Prompt
- Click on the Fallback Prompt tab. The Fallback Prompt is played in the event a caller does not provide input or is not understood. With a Fallback Prompt we can provide context sensitive help to the caller. In this example we will provide the TTS - "This is a natural language system. Just say what you would like to do. For example, send me to the billing department or speak to a representative". This gives the caller more context on how they can respond to the system.
No Input Prompt
- This prompt will play if the caller does not provide any input. Once the No Input Prompt is played it will the play the Fallback Prompt to provide more context to the caller and try again.
No Match Prompt
- This prompt will play if the caller's input is not understood by the system. Because the Cloud Speech-to-Text node uses natural language, a No Match Prompt will only occur if you are using a very high transcription confidence score. Otherwise the voice recognition will always try to match it to something. Once the No Input Prompt is played it will the play the Fallback Prompt to provide more context to the caller and try again.
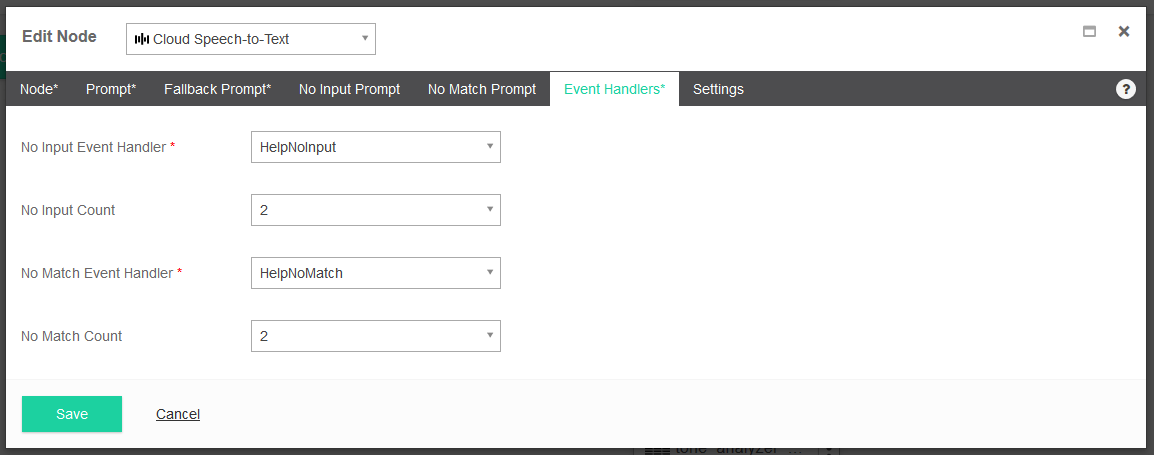
Event Handlers
An Event Handler will come into effect if a set number of No Input Prompt and/or No Match Prompt events occur. It is designed to direct a caller to an alternate area if their inputs are either not being heard or understood by the system.
- Select the Event Handlers tab. Event Handlers are used when there is still no match or no input detected after multiple attempts from the caller. In the No Match Event Handler drop down menu, select "==NEW EVENT HANDLER==" and give it a unique name. We will call ours - no_match.
- Leave the No Match Count to the default value of 2. This value tells Studio after how many attempts should it trigger the event handler. Repeat the same steps for the No Input Event Handler and define a new event handler. We will call ours - no_input. Leave the default value of 2 for the No Input Count field.
Settings
- Select whether your task should allow Bargein or not. Bargein allows the caller to interrupt the system and key ahead to the next prompt. This can be a great feature as it enables experienced users to move rapidly through the system to get to the information that they want. However, there will be cases when you may want to disable bargein. e.g. When your prompts or menu system have changed recently.
- Confidence Level is the system's confidence when interpreting an input from a caller. The higher the confence level, the more accurate the caller's inputs must be.
- Single Utterance is ON by default.
- A single utterance is a string of things said without long pauses. A single utterance can be yes or no or a request, like Can I book an appointment?, or I need help with support.
- You may decide to disable the single utterance setting if the caller is expected to pause as part of the conversation. For example, the caller may read out a sequence of numbers and pause in appropriate places.
- Single Utterance must be OFF to customize Inter Result Timeout and Speech Complete Timeout.
- Inter Result Timeout
- To customize, turn OFF Single Utterance.
- Shortens or lengthens the time where silence delimits interim results.
- The typical use case would be for a caller reading out numbers. The caller might pause between the digits.
- Generally speaking, the Inter Result Timeout is set between 1 and 2 seconds.
- When set, ensure the allocated time is shorter than, and not too close to, the Speech Complete Timeout.
- Inter Result Timeout does not reset if there is background noise. Speech Complete Timeout does reset if there is background noise. If there is background noise, Inter Result Timeout may be more reliable in determining when the speech is complete.
- Speech Complete Timeout
- To customize, turn OFF Single Utterance.
- Speech Complete Timeout shortens or lengthens the time where silence indicates the caller's speech is finished.
- Use for responses with an interlude to ensure the system listens until the caller's speech is finished.
- Recognition Model
- Studio supports these Google Cloud Dialogflow voice models. The voice models available depend on the language selected.
- ASR Default - Use if your audio does not fit the other models. You can use this for long-form audio recordings that feature a single speaker only. ASR default produces transcription results for any type of audio, including audio from video clips. Ideally the audio is high-fidelity, recorded at 16,000Hz or greater sampling rate. Do not use when Single Utterance is selected.
- Latest Long - Use for long content. Examples include media like video or spontaneous speech and conversations. You can use this in place of the default model.
- Latest Short - Use for short utterances a few seconds in length. Examples include capture commands. Consider this model instead of ASR Command and Search.
- Phone Call - Use to transcribe audio from a phone call. Typically, audio from a phone call is recorded at 8,000Hz sampling rate.
- ASR Command and Search - Use for shorter audio clips. Examples include voice commands and voice search.
TIP
When Single Utterence is ON, either leave the Recognition Model as ==Disabled== or set the Recognition Model to Phone Call or ASR Command and Search. Single Utterance cannot be used with other recognition models.
- Click Save.
Comment
The Comment node is purely for documenting the purpose of a task in the Studio interface.
Comments have no effect on the call flow logic. An example of this would be to use one at the start of a task to describe the basic function of the task.
- From the Node tab, provide a new Node Name.
- From the Settings tab, write your Comment.
- Save.
Conversation Node
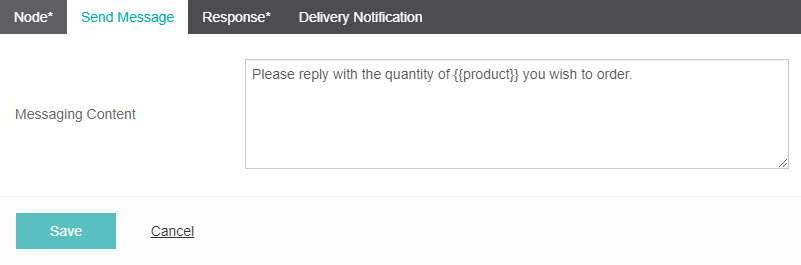
The Conversation node allows you to send an SMS, and extract details of an SMS sent in response, and direct the SMS flow down one of several paths based on the user’s response. In this example we will be asking a user for a quantity of a product.
- From the Node tab, provide a new Node Name. We will call ours ask_quantity.
- From the Send SMS tab, enter content for your SMS. If you want to use dynamic content for the SMS content you can insert variables via the
{{operator and selecting the variable. We will use the SMS content: Please reply with the quantity of {{product}} you wish to order.
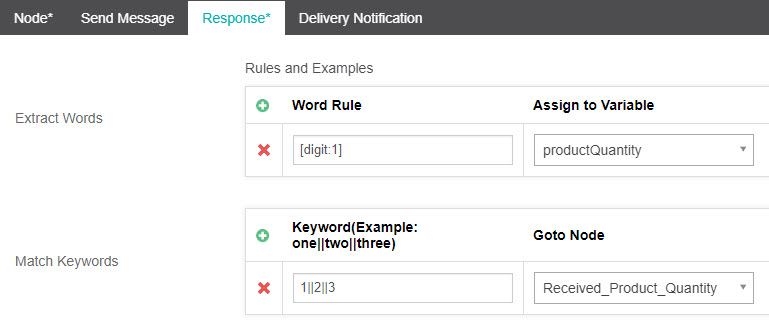
- From the Response tab Fill in the Word Rule option. This allows you to capture user input into a variable if you wish.
- Under the Word Rule column add a rule. A rule can be in the form of
- [email] which will match an email address
- [digit:1-5] which will match a string of digits which is 1 to 5 digits long
- [letter: 1-5] which will match a string which is 1 to 5 letters long.
TIP
It is possible to chain letter and digit input together in one rule for example [letter:3,digit:3]. This example will match input such as: abc123.
For this example we will use the Word Rule [digit:1]. 5. Select an existing variable from the dropdown menu under the Assign to Variable column or select ==New Variable== and provide a name. We have called our variable product_quantity. To add additional word rules select the green + icon. To delete word rules select the red X icon. 6. Fill in the Keyword option. Enter 1 under the Keyword column. Note: to separate multiple Keyword options use the double pipe character || for example 1||One. For our example we will use 1||2||3. 7. Select an existing node from the dropdown menu under the Goto Node column, or select ==New Node== and provide a name. We will call our node option "received_product_quantity". To add additional subnodes select the green + icon. To delete subnodes select the red X icon. 8. Select which node you would like to direct the SMS flow to if the condition is not matched. It can either be an existing node, or a new node, created with ==New Node==.
Data Store
Data Stores are a powerful tool because they allow you to capture data from call flows that form the basis of customized reports.
Before a Data Store node will work, you must create a Data Store into which the data will be captured.
- From the Node tab, provide a new Node Name.
- Select the Settings tab.
- From the Data Stores dropdown menu, select the Data Store that you would like this node to use. When you select the Data Store you will notice the Columns below will update based on the columns assigned to the Data Store.
- Under the Data Row Id for update section you can choose to provide a Row Id, or leave it blank. If you leave it blank, an Id will be auto-generated when the task is run.
- Under the Columns section you will see the columns associated with your Data Store. By selecting the Edit button for a particular column you will be able to assign the input value for that column. This is done via the Expression Builder.
- Under the Assign return data row id to variable section you can either select an existing variable from the dropdown menu. This is the variable that data will be assigned to for the duration of the call. You can also assign the data to a == NEW VARIABLE ==.
Day Time
The Day Time node allows a call to be rerouted to a different node based on the current time condition (e.g. if business hours - transfer to an operator. If outside of business hours - transfer to voice mail ). Only day of the week and time can be specified.
The Day Time node is similar to the Calendar Node in that it allows a call to be directed based on day/time parameters although the Calendar node allows more detailed conditions such as year, month and time, as well as repetition conditions.
TIP
As a general rule, the Calendar node is more suited if you have an event that occurs on an irregular interval or a one-off event per year. For example, Christmas Day. The Day Time node is better suited to events that occur at a regular interval. For example, Weekends.
- Assign a Node Name.
- Go to the Settings tab.
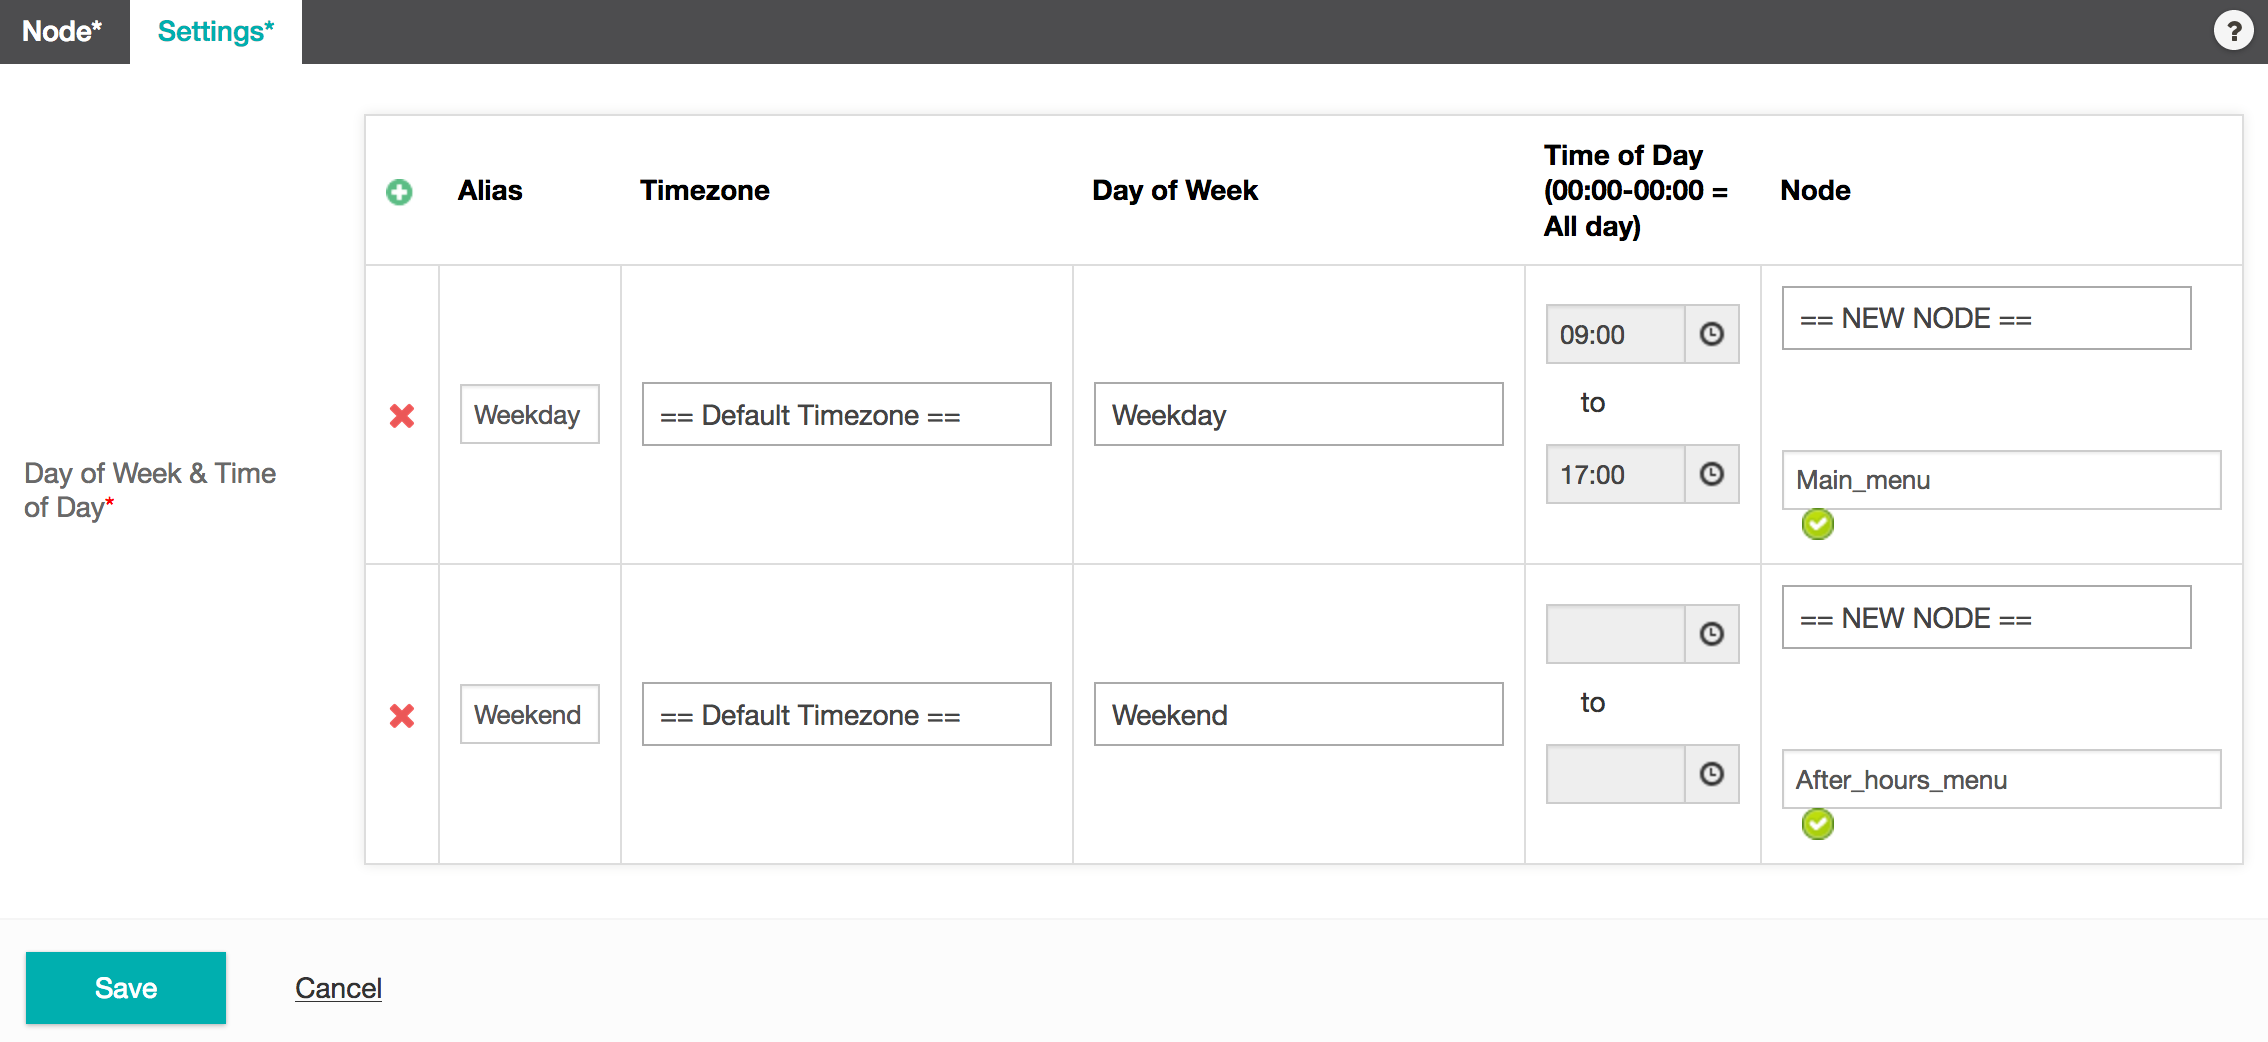
- Inside the Day of Week & Time of Day section fill in the required fields: a. Fill in the optional Alias field. This helps keep track of specific day assignments. We will call our first one Weekdays and the second one Weekends as we want to specify different callflows based on whether it is a weekday when the office is open or weekend when the office is closed. b. You can select an optional Timezone for your Day Time routing. We will leave ours as == Default Timezone ==. c. From Day of Week you can select specific days in the week or collections of days such as Weekdays, Weekends or Everyday. d. From the Time of Day you can select a specific start/end time or leave the default 00:00 - 00:00 for All Day. This can be helpful if you were wanting to create a Day Time node which operates outside of business hours, such as between the hours 17:00 and 09:00 for example. e. Under the final Node section you will need to assign either a pre-existing node or a == NEW NODE == to route to. We will route our Weekday calls to the Main_Menu f. Repeat steps 1 to 5 for each condition you wish to make. We have created a second condition with the Alias Weekend, which will operate on Weekends and route calls to a == NEW NODE == > after_hours_menu.
- You will need to complete the Otherwise Goto Node that calls will route to if none of the above conditions are met. In this case we have only have the options of Weekdays and Weekends so assigning an Otherwise Goto Node may seem redundant, but it is a good practice to make sure the call has a backup node just in case. This is a required field.
TIP
The Time of Day section uses the 24 hour clock convention.
Decision
The Decision node allows you to perform logic calculations during a call. Decision nodes are very flexible and a wide variety of functionality is supported. Each Decision node must be followed by one or more branch nodes which will be created based on the conditions you set. Based on the conditions provided, Studio will automatically create the Subnodes. You are also able to add as many conditions as you want for a decision node. If none of the conditions are met, then the Call Flow will follow the Otherwise Goto Node which is requirement when creating a Decision node.
By using a decision node you can route a caller to any number of Scripts or Menu nodes, depending on the decisions they make, and the logic inside the node.
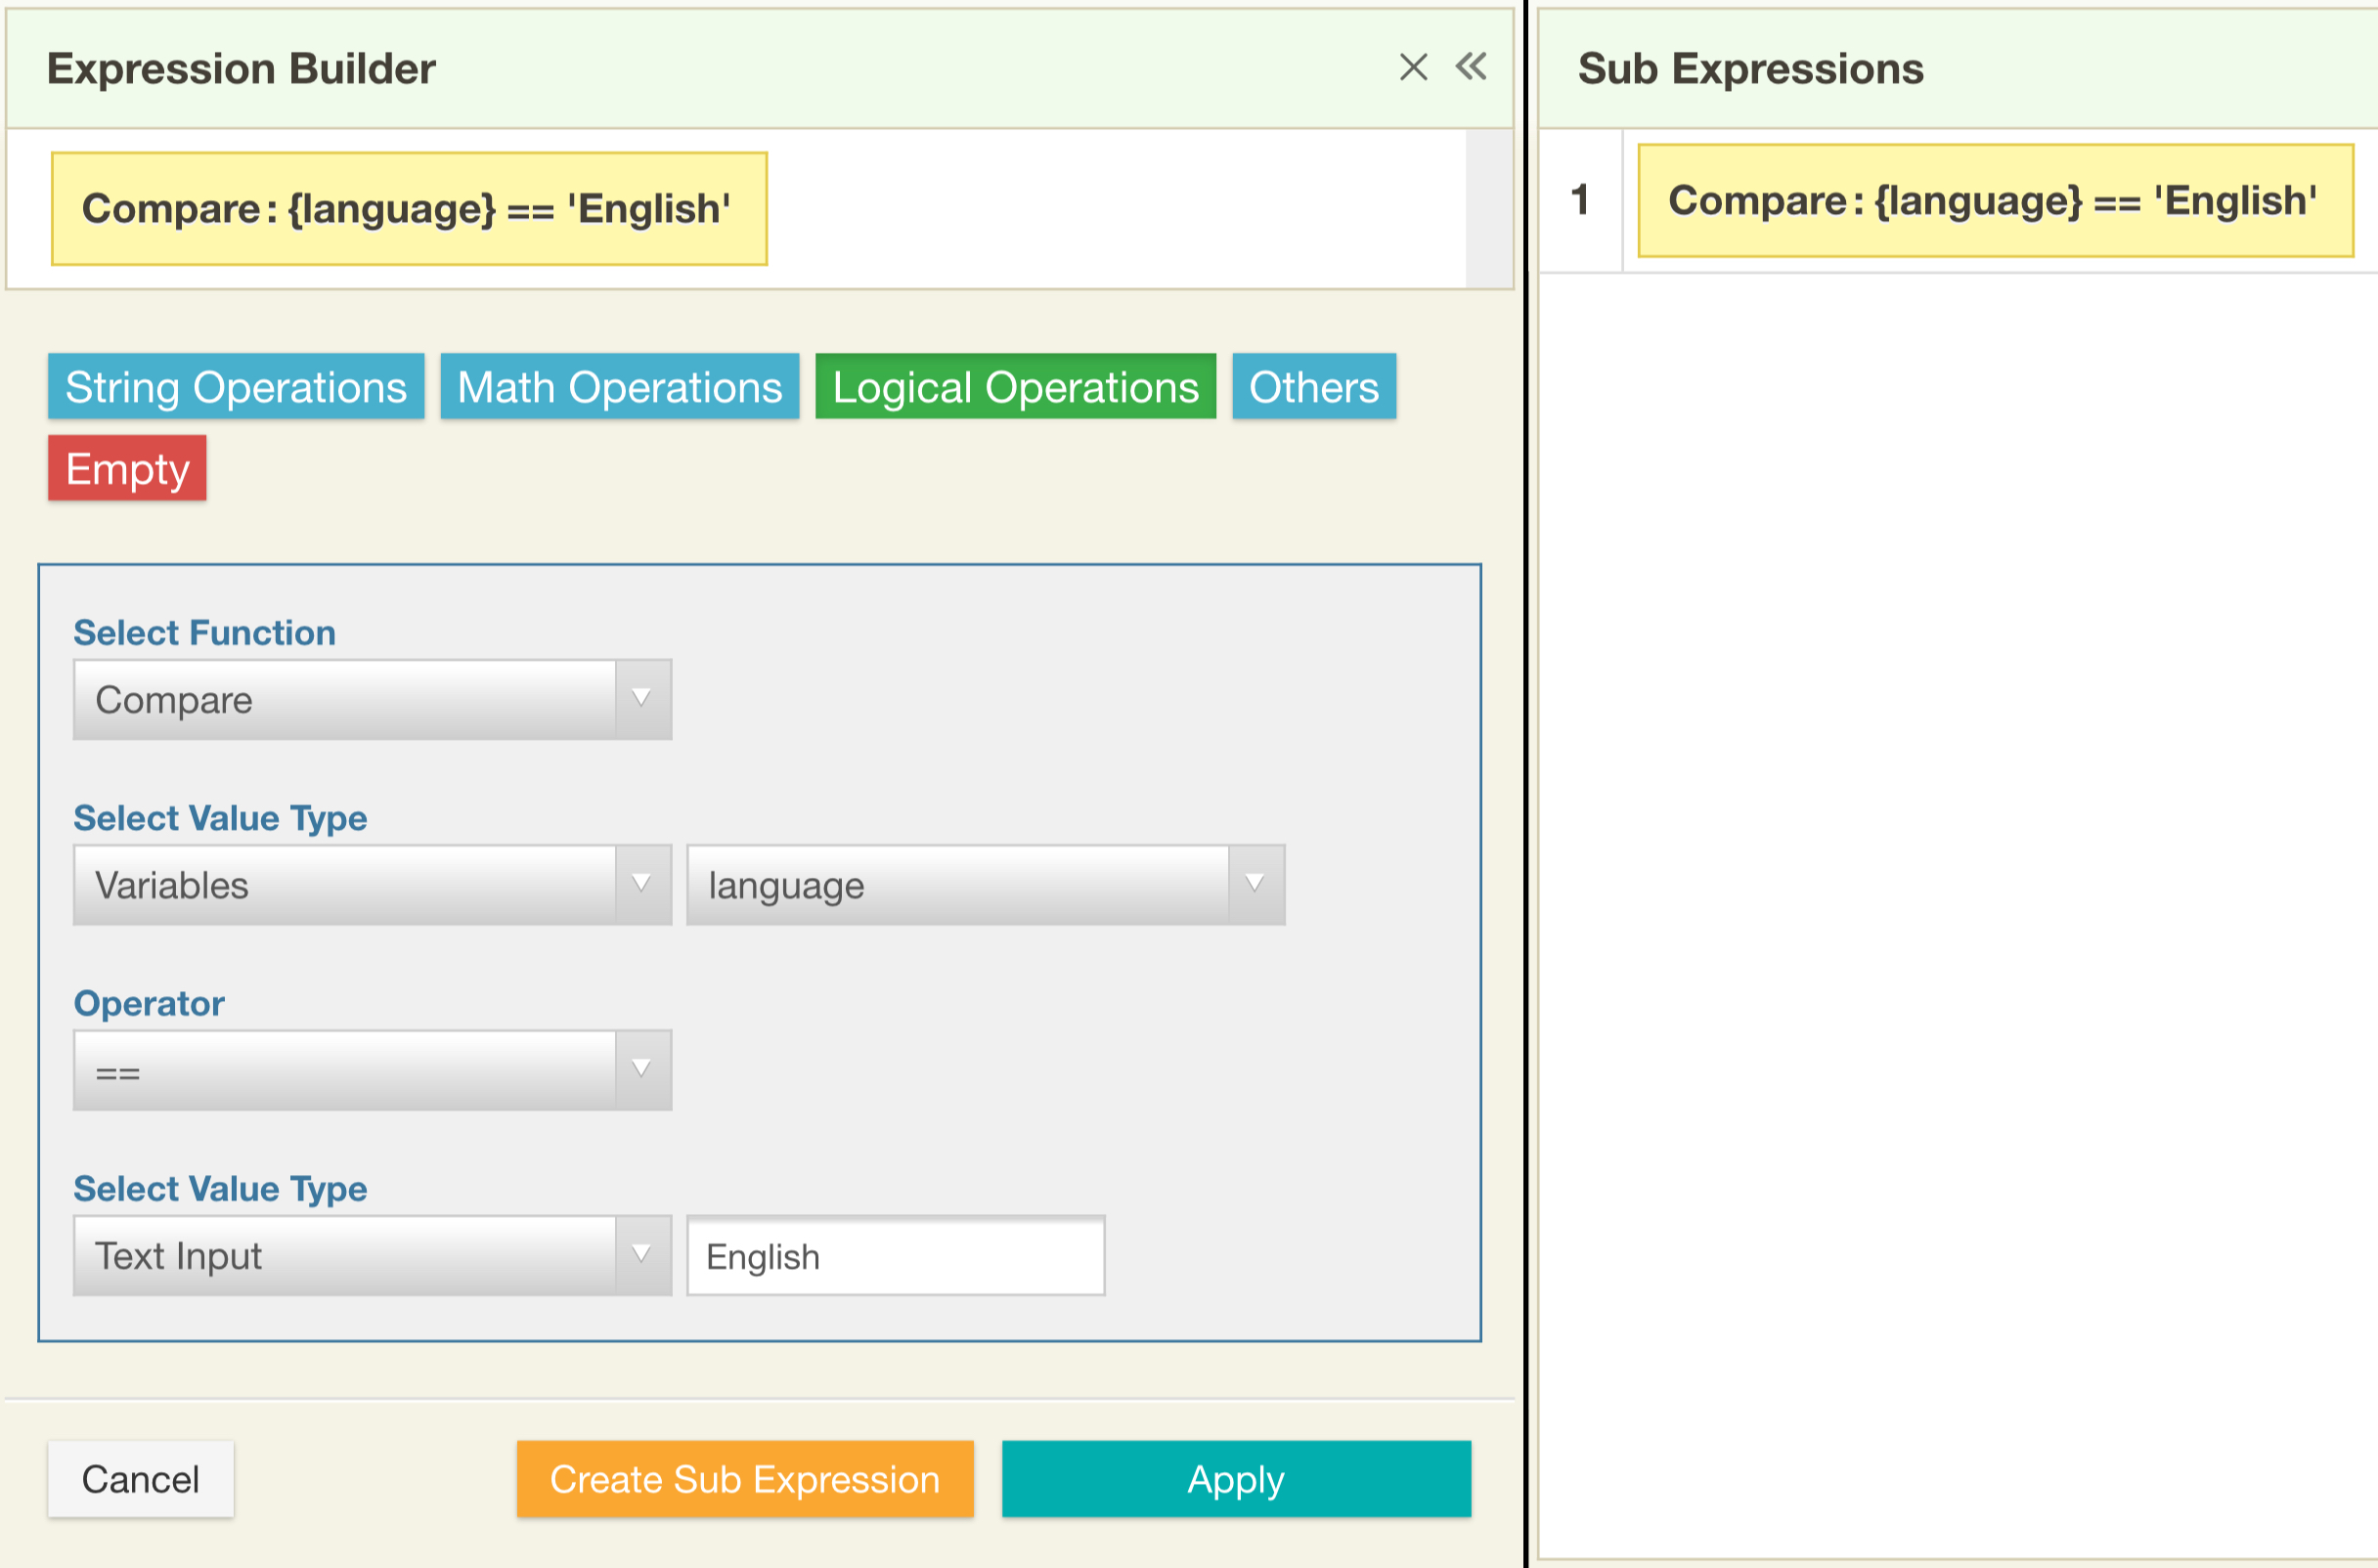
To build your decision module, you will need to use the Expression Builder.
- Create an Expression with the Expression Engine. We have created an expression to test whether the caller speaks English or not.
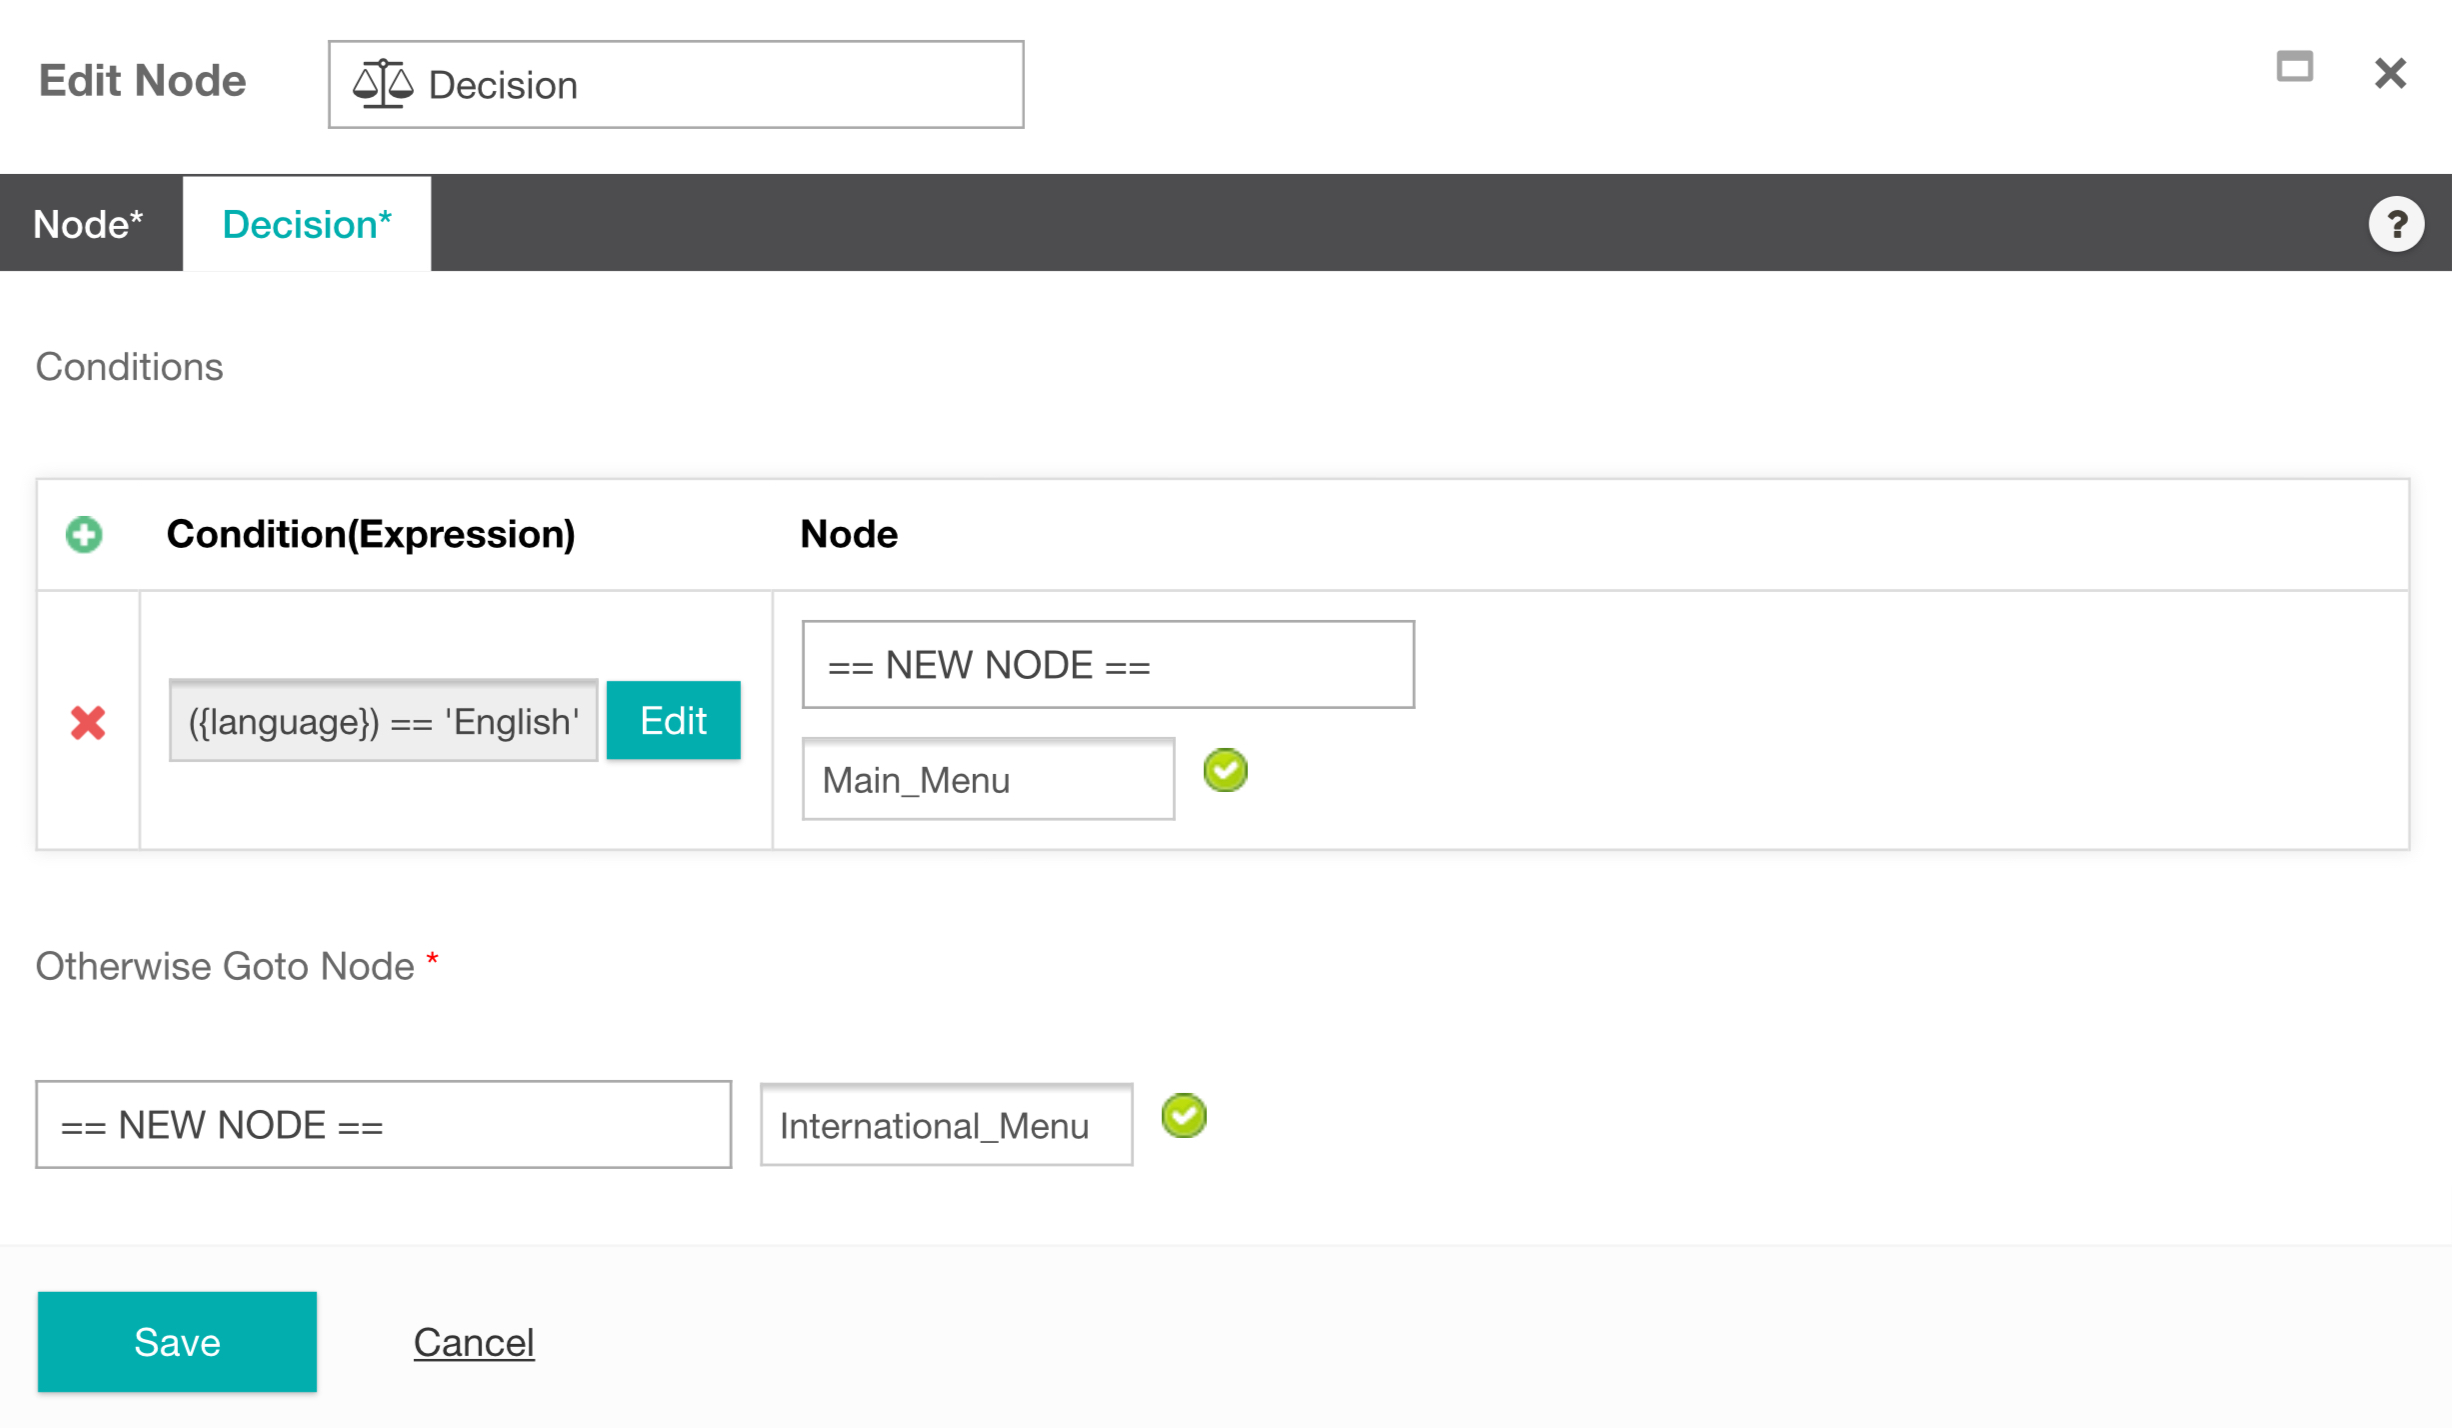
- Use the Expression we just created inside the Condition (Expression) field.
- Set the Node to Main_Menu. What this means is that if the caller's response matches true against the condition we set in our Expression Engine (i.e. that Language is equal to English) then they will be directed to the Main Menu. If the caller's response does not mach then they will be directed via the Otherwise Goto Node.
- Select which node you would to direct the caller to if they do not match the condition. This can either be an existing node, or in this case, we have decided to create a == NEW NODE == to direct them to, called alternate_menu.
Dialog Flow
The Dialog Flow node allows you connect directly to a Google Dialog Flow Agent. This agent will take in text and analyze it.
TIP
This node requires that an agent be built in Google Dialog Flow and the node will need the Agent Client Access Token.
Create a Google Dialogflow account
Dialog Flow Documentation
From the Settings tab > In the Service Account field, upload the Dialogflow service account private key credentials as generated in your Google Cloud account. In the Project ID field, specify the project ID for the Dialogflow virtual agent.
Parameters (Text Input)
Enter the variable that stores the text you would like Dialog Flow to Analyze into the Query box - use double curly brackets on either side of the variable name. For testing purposes, you will want to enter a test phrase into this box, be sure to change it back to the variable before saving the node.
Parameters (Event Input)
Fill in the Dialogflow Event Name and Event Parameters.
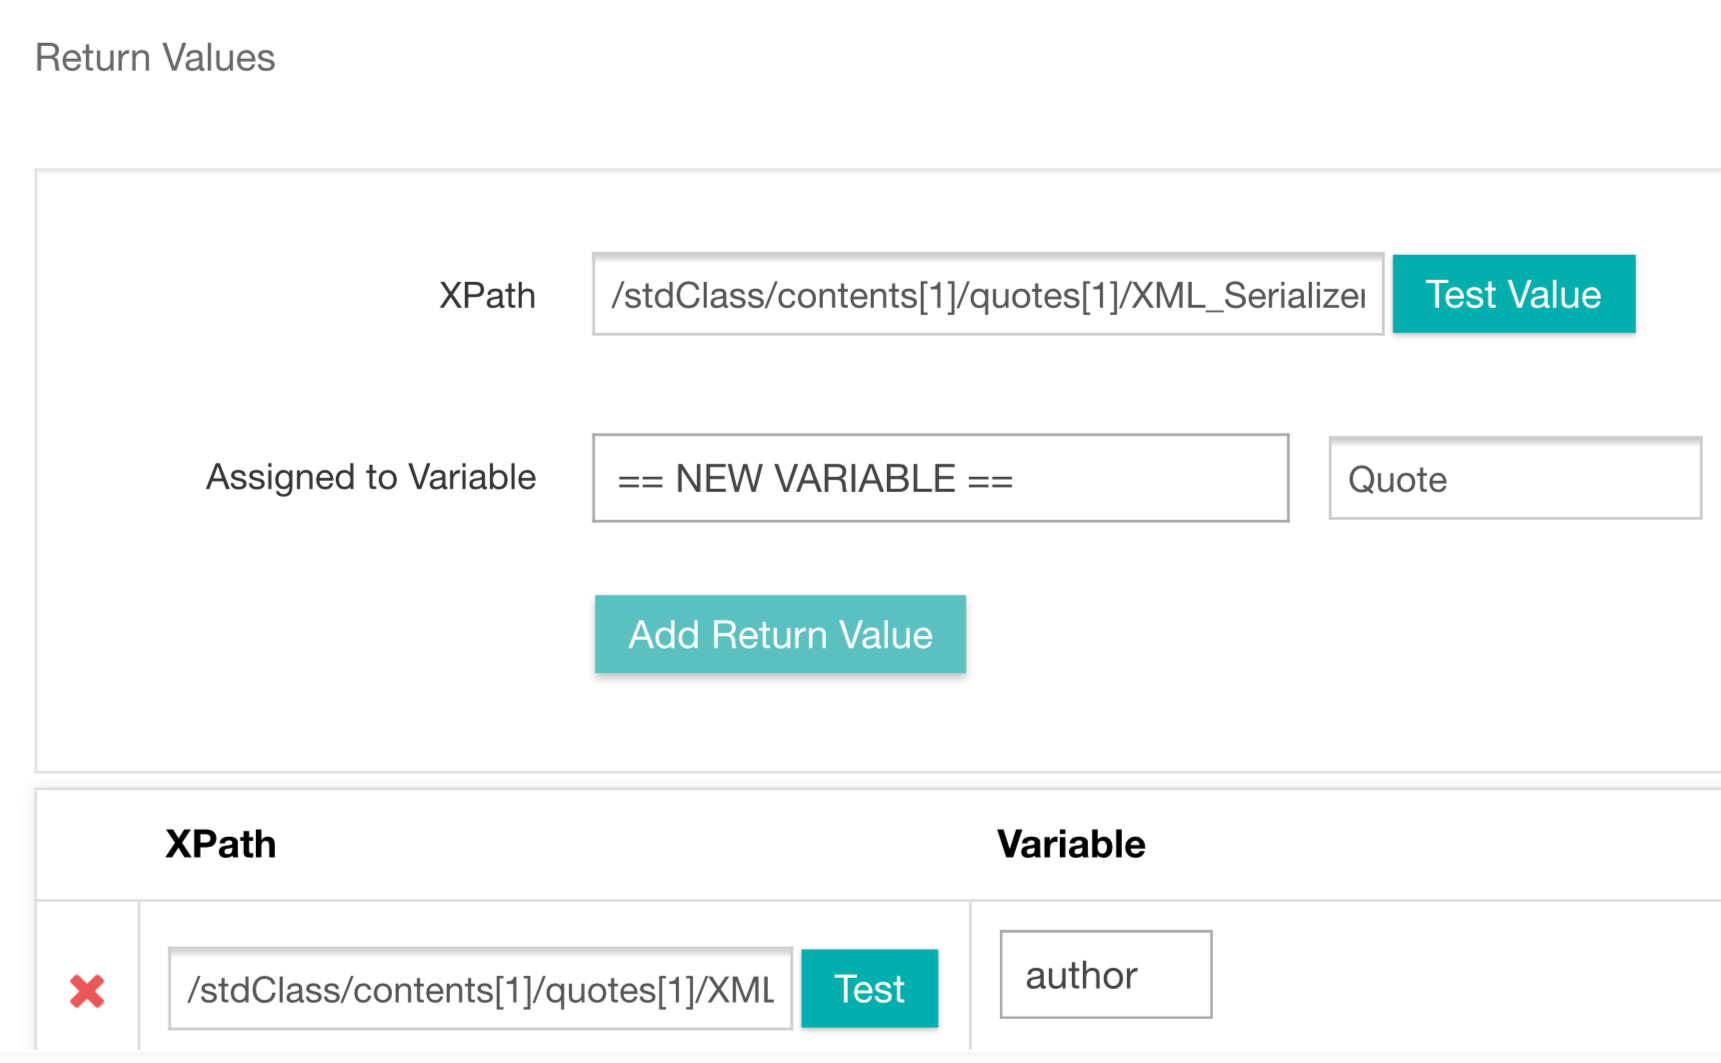
Return Values
Select the Preview Test XML button. If your preview is successful, Dialog Flow will return a collection of data.
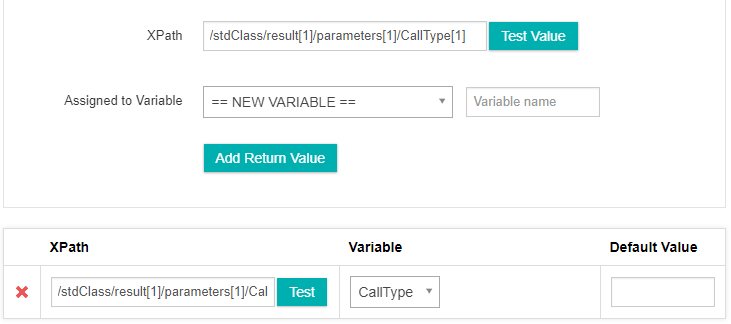
To select a specific Parameter simply click the parameter inside the preview XML document. Studio will automatically extract the XPath for that parameter.
The Xpath can then be assigned to an existing studio variable or to a == NEW VARIABLE == from the Assigned to Variable dropdown menu.
To assign the Xpath to a new variable you will also need to provide a variable name. Let's assign the quote XPath to a new variable called "quote".
Select the Add Return Value button to complete the variable assignment.
Distribute
The Distribute node allows you to direct incoming calls across multiple streams within the same task, or have them redirected to a different task.
- From the Node tab > provide a Node Name.
- From the Settings tab > assign a Weight Allocation The Distribute node works by defining a percentage for each branch. In the example above, we are instructing our Studio task to direct 10% of all call's to a survey and the other 90% of calls to normal task operation.
Studio allow's the distribution to added in percentage that range between 0 and 100. It will automatically redirect the calls to specifed location based on the percentages provided in this node. Each branch links to its own node. The branch node could be ranging from a simple transfer or to a new menu with in the call flow or a new task that handles a different call flow.
Email Report
- From the Name tab, provide a new Node Name.
- From the Settings Tab, select a Snapshot from the dropdown menu. A Snapshot is a pre-defined custom report. If you have not yet created a Snapshot you can learn how to do that here.
- Provide the Email address(s) you would like the report email to. You can add additional email addresses by selecting the green + icon.
Form
The Form node allows you to collect information from grammar and DTMF inputs. It's important to note that each Form node relates to one question. If you wanted to create a survey for example, then you would need to create Form node for each individual question.
Node
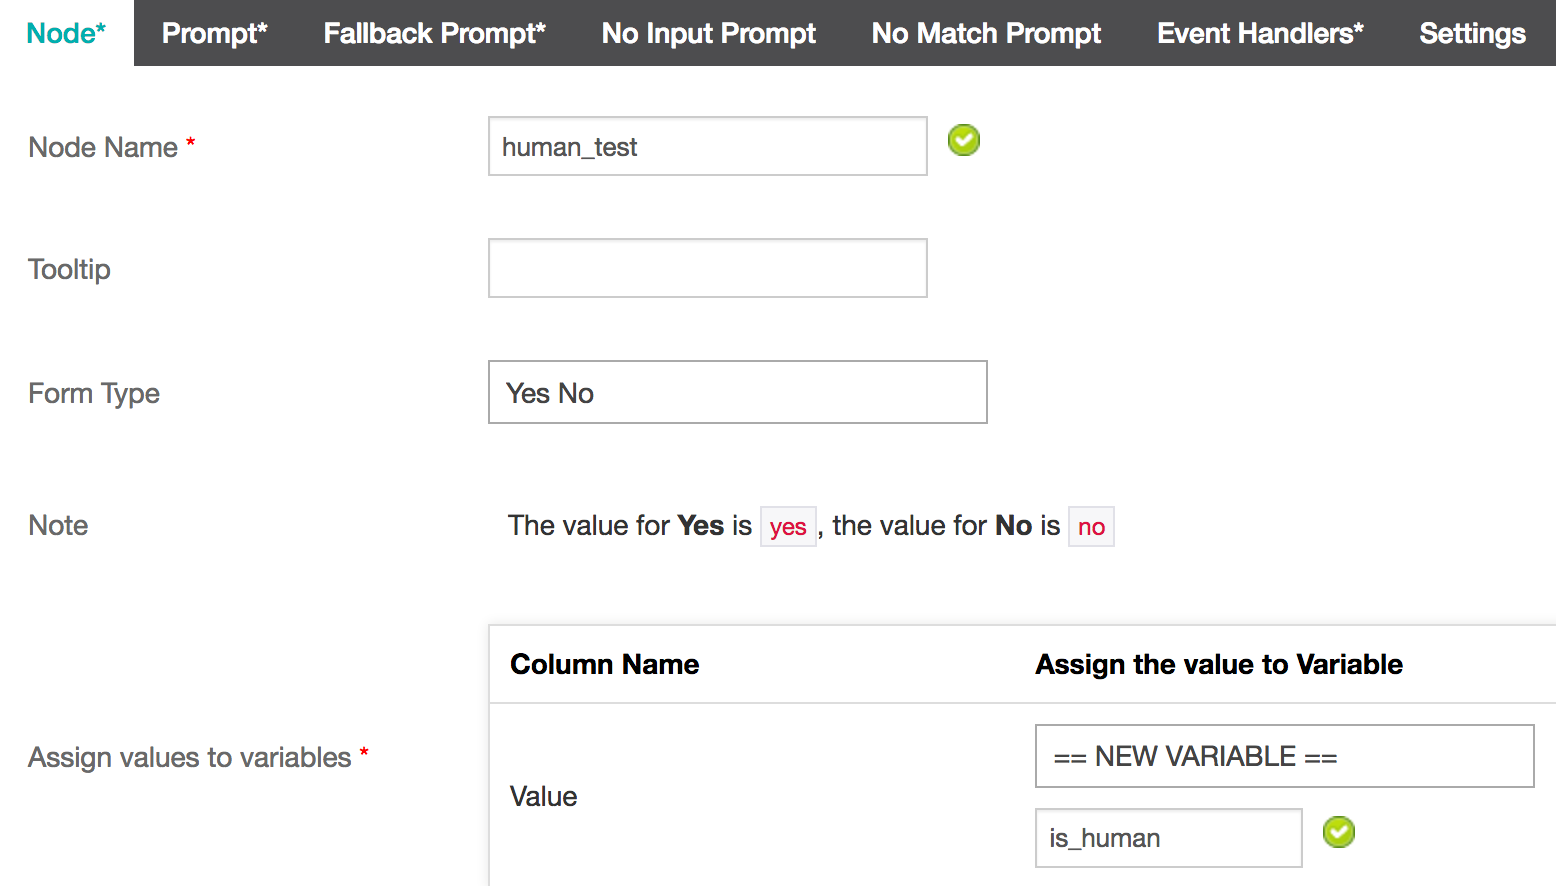
- Provide a Node Name for your form. We have called ours human_test for this example. We will be creating a survey form to ask whether the caller is human or not.
- Select the Form Type from the dropdown menu. Inference Studio includes a few common form types that will suit most use cases, however you can also create your own custom form types.
Included Form types:
Yes No This is for questions that require a Yes or No response.This is the Form Type will use for our human_test example. You will also need to Assign values to variables. This way you can access the values from the survey later on. We will assign the responses to the variable, is_human.
Scale This is for questions that require a numeric response on a scale. For example, "On a scale of 1 to 5, how likely..." You will need to specify the Start of scale and End of scale parameters. You will also need to Assign values to variables. This way you can access the values from the survey later on.
Custom Digit String This is for questions that require a numeric response of a specific number of digits. For example, if you wanted to capture zip codes in the United States, (e.g. 90210) you would set the Minimum No. of digits to 5 and the Maximum No. of digits to 5 also.
Alpha Numeric This is for responses that contain both letters and/or numbers. For example, a caller providing a reference ID (A12345).
Digit String This is for responses that contain numbers only, of any length. e.g. 12345
Integer This is for responses that contain a single integer. e.g. 7
Payment - Credit Card Number
- masked card - returns the first 6 and last 4 digits of CC number
- luhn check - performs a luhn algorithm check to determine if the card value is either valid or invalid.
- card type - checks card type. The potential return values are:
- mastercard
- visa
- amex
- discover
- diners
- jcb
TIP
Studio will also automatically return the speech to text value of the credit card. This is assigned to the variable
card_numberThe speech to text value of last 4 digits of the credit card are also returned and assigned to the variable
last_4_digits_of_card_numberPayment - Credit Card Expiry The credit card expiry value is returned in the month/year format
0221Studio also returns the speech to text value of the card expiry. This is assigned to the variablecard_expiryPayment - Credit Card CVC Studio will automatically return he speech to text value of the CVC. This is assigned to the variable
card_cvc
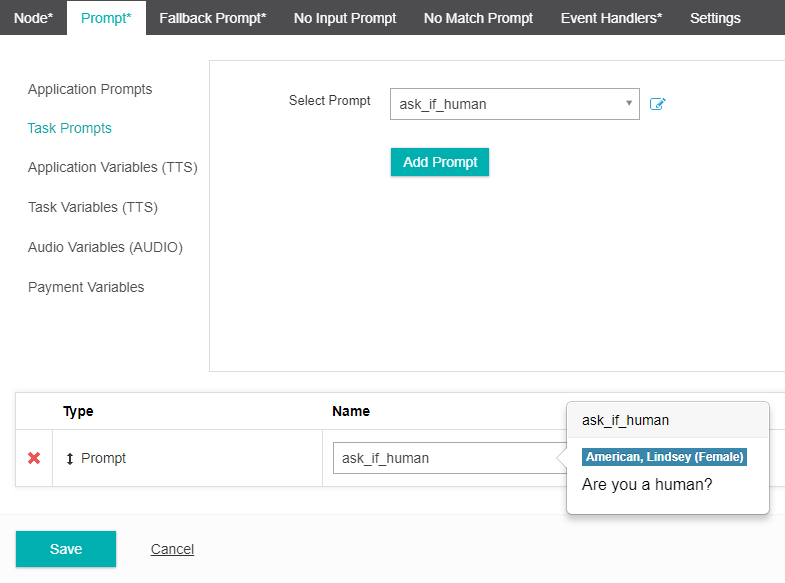
Main Prompt
- From the Main Prompt >> Task Prompts tab, choose Select Prompt. Select an existing prompt or choose == NEW PROMPT ==. We have created a new prompt called menu_prompt.
- Select Language, Voice and/or a TTS or Audio file. We have created the following TTS: For Sales, press 1. For Support, press 2.
- Select Save.
- From the Select Prompt menu, choose the prompt you just created and select Add.
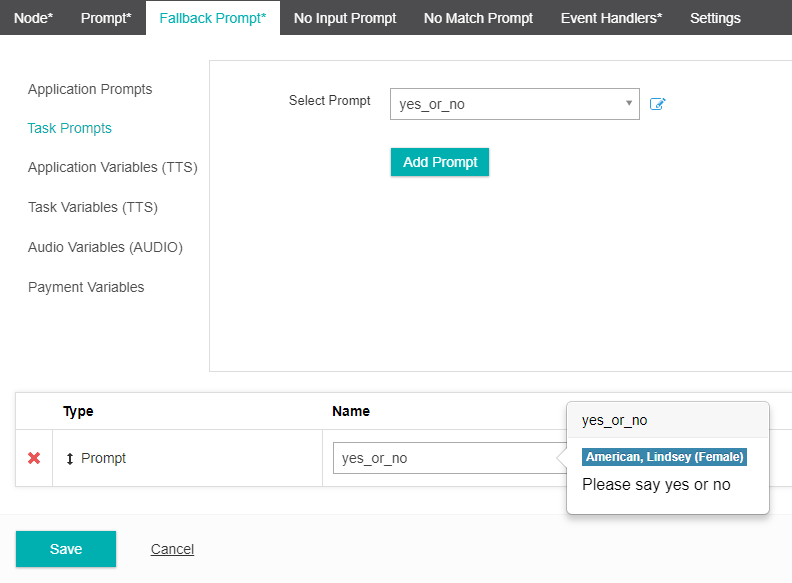
Fallback Prompt
Fallback Prompt, is a secondary prompt that will be used if the caller responds to the menu with input that is either not understood or does not provide input at all.
- From the Tap Prompt >> Task Prompts tab, choose Select Prompt. Select an existing prompt or choose == NEW PROMPT ==. We have created a new prompt called yes_or_no.
- Select Language, Voice and/or a TTS or Audio file. *We have created the following TTS: Please say yes or no.
- Select Save.
- From the Select Prompt menu, choose the prompt you just created and select Add.
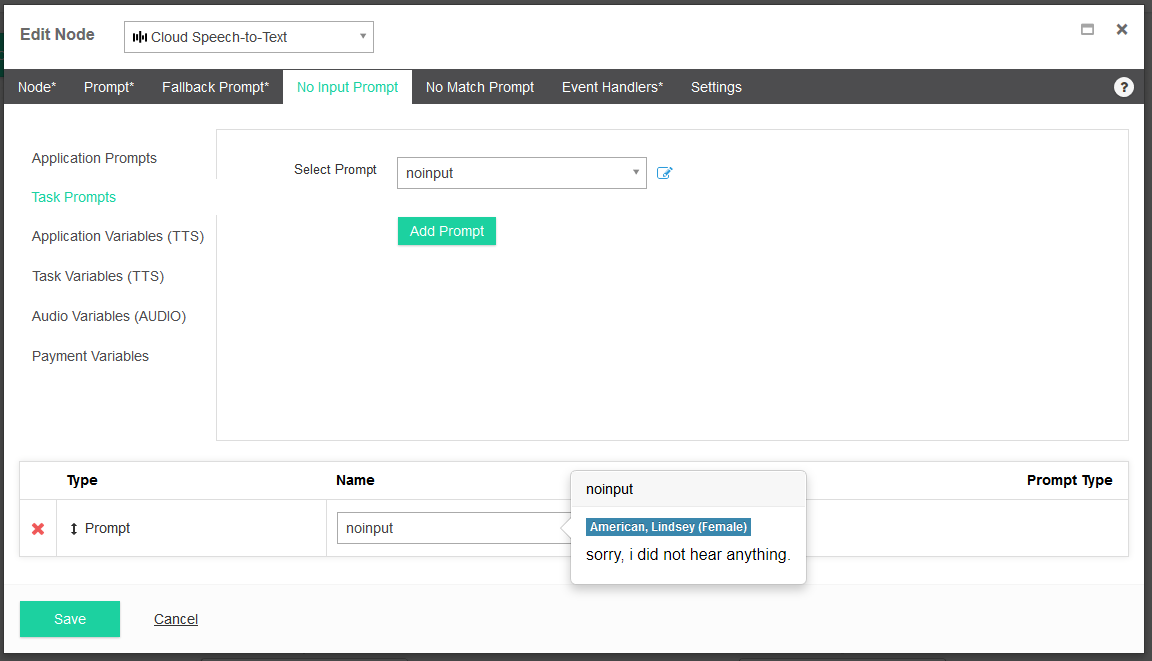
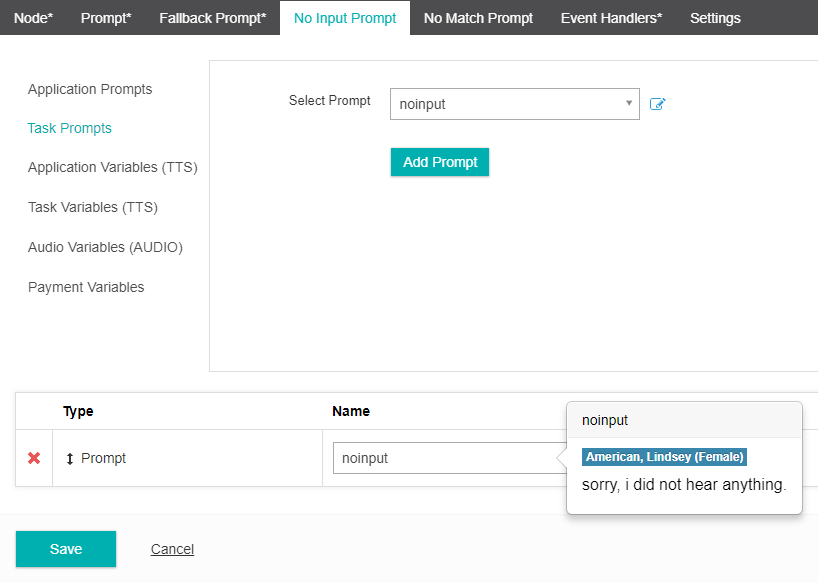
No Input Prompt
This prompt will play if the caller does not provide any input, whether it be a Grammer response or DTMF. The Tap Prompt will then play to direct the caller to provide a new input.
- From the No Input Prompt >> Task Prompts tab, choose Select Prompt. Select an existing prompt or choose == NEW PROMPT ==. We have created a new prompt called noinput.
- Select Language, Voice and/or a TTS or Audio file. *We have created the following TTS: *Sorry, I did not hear anything.
- Select Save.
- From the Select Prompt menu, choose the prompt you just created and select Add.
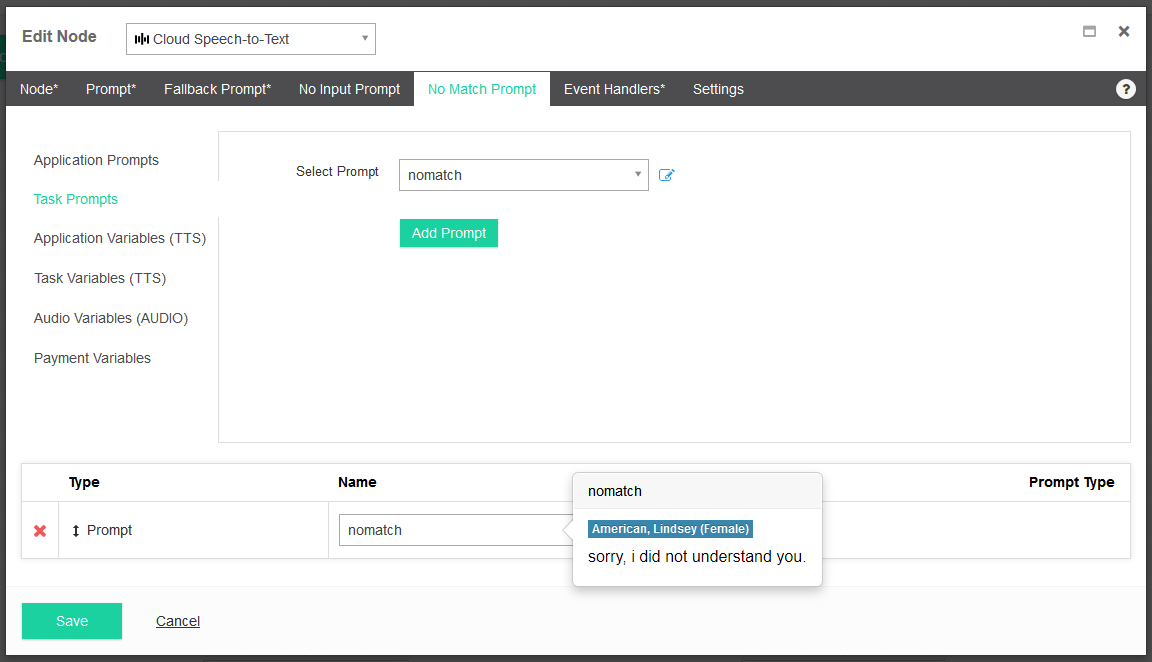
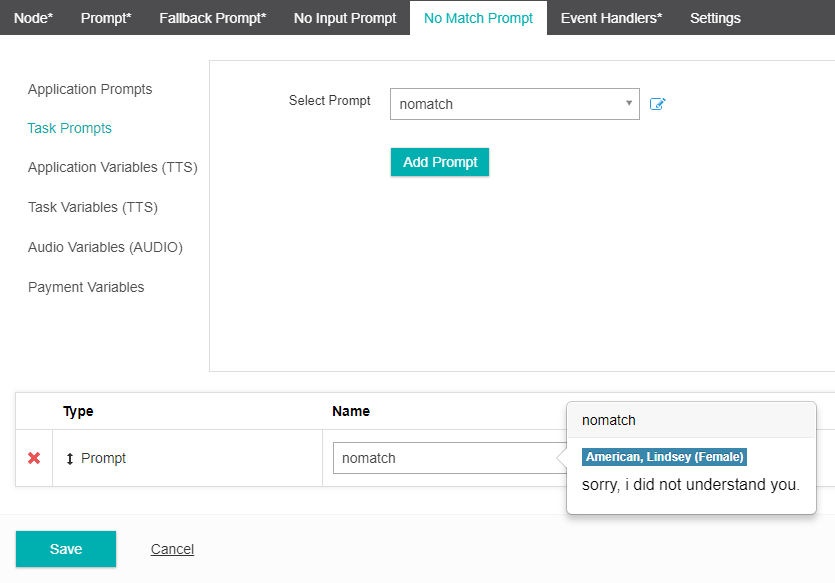
No Match Prompt
This prompt will play if the input provided by the caller is not understood by the system. The Tap Prompt will then play to direct the caller to provide a new input.
- From the No MatchPrompt >> Task Prompts tab, choose Select Prompt. Select an existing prompt or choose == NEW PROMPT ==. We have created a new prompt called nomatch
- Select Language, Voice and/or a TTS or Audio file. We have created the following TTS: Sorry, I did not understand you.
- Select Save
- From the Select Prompt menu, choose the prompt you just created and select Add.
Event Handlers
An Event Handler will come into effect if a set number of No Input Prompt and/or No Match Prompt** events occur. It is designed to direct a caller to an alternate area if their inputs are either not being heard or understood by the system.
- Select the Event Handlers menu.
- Choose a No Match Event Handler or select == NEW EVENT HANDLER ==
- Choose a No Match Count. This is the number of No Match events that will occur before the Event Handler comes into effect. The default count is two (2), but you can choose any number between 1 and 9. For example, if a caller's input is not being understood by the system, rather than have them provide a response repeatedly, it will give them two (2) additional attempts before the Event Handler takes over to direct them to an Operator.
- Choose a No Match Event Handler or select == NEW EVENT HANDLER ==
- Choose a No Input Event Handler. This is the number of No Input events that will occur before the Event Handler comes into effect. The default count is two (2), but you can choose any number between 1 and 9.
- Select Save.

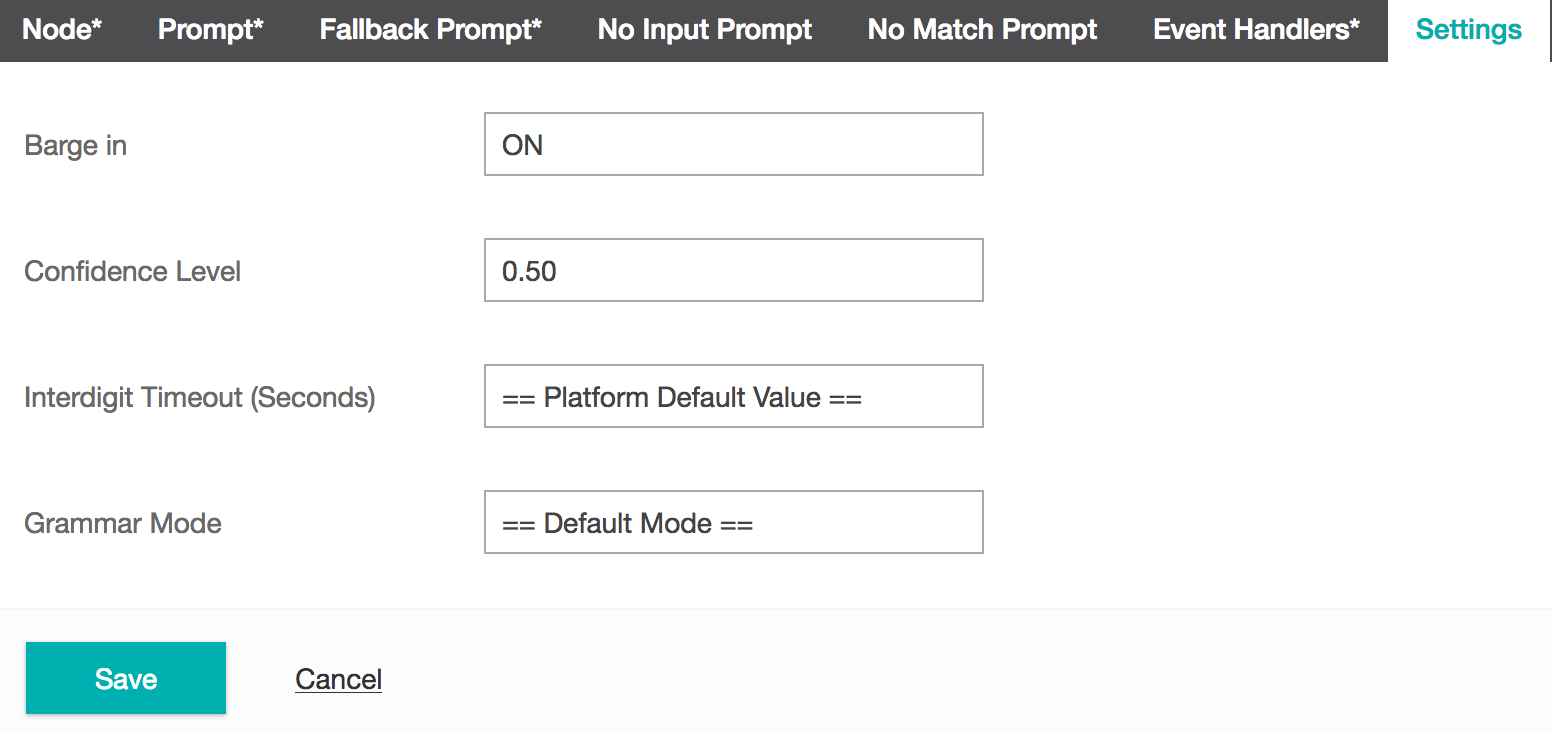
Settings
Under the Settings menu you have access to various options for your prompts.
- Select whether your task should allow Bargein or not. Bargein allows the caller to interrupt the system and key ahead to the next prompt. This can be a great feature as it enables experienced users to move rapidly through the system to get to the information that they want. However, there will be cases when you may want to disable bargein. e.g. When your prompts or menu system have changed recently.
- Confidence Level is the systems confidence when interpreting an input from a caller. The higher the confence level, the more accurate the callers inputs must be.
- Interdigit Timeout (Seconds) refers to the timeout between DTMF key presses from a user. The longer the timeout the greater the allowable time between each key press. The platform default value is two seconds.
- Grammar Mode allows you to turn off grammar detection and only allow DTMF inputs. The default mode is Speech Grammar enabled.
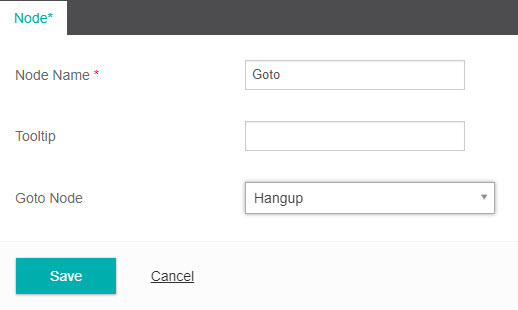
Goto
The Goto node can be used in several different ways:
- To direct a call to another Node inside the current task
- To direct a call to another Canvas inside the current task
- To direct a call to a different Task.
- To implement a simple Looping mechanism within the task.
- Provide a new Node Name.
- Select where you would like the call to be directed to from the Goto Node dropdown menu.
- Select Save.
Hangup
The Hangup node terminates a call. It can be inserted at any point in a task.
- Provide a new Node Name.
- Select Save.
Hangup Header
The Hangup Header node allows you to send a custom SIP header when a call is terminated in Studio. This is useful if you are using an IVR-Behind-Switch Call Flow and wish to send call data back to your system following a hangup event in Studio. e.g.a customer's name or reason for calling etc.
The SIP Header data is sent via the SIP BYE message. You can add any key:value pairs to the SIP BYE message via the Hangup Header node.
- Inside the Hangup Header node, provide a Name.
- Select the Header Settings tab.
- Using the Expression Builder, provide the Key Value pairs for the data you wish to send via the SIP BYE message. Select Save.
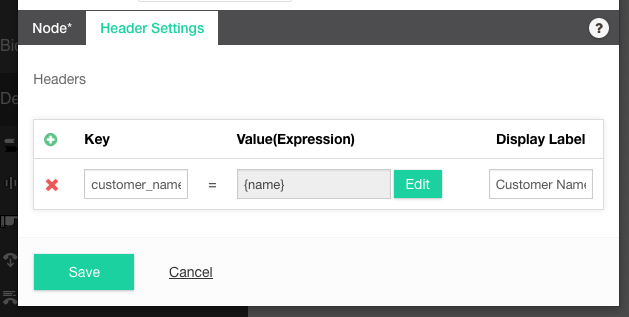
Below is an example of a SIP BYE message. The bottom three fields: customer_name:Sarah, customer_number:123456789 and customer_query: product issue are an example of custom SIP header key:value pairs being sent via the SIP BYE message.
BYE sip:10.216.235.37:5060 SIP/2.0
Via: SIP/2.0/UDP 10.216.235.169:5139;branch=z9hGg8Ka5ea.0033483.0
From: "0370103224 0370103224" <sip:0370103224@bwas2.inferencecommunications.com>;tag=7017056616
To: "Service Provider" <sip:serviceprovider.sp.com;user=phone>;tag=735968-14327755375-
Call-ID: BW045235105155071359@10.216.244.37
CSeq: 1650750139 BYE
Max-Forwards: 69
Content-Length: 0
customer_name: Sarah
customer_number: 123456789
customer_query: product issue
TIP
SIP header size limitations for x-header data passed between VCC and Studio are as follows. From Studio to VCC the characters entered in the hangup header node should not exceed 10k. From VCC to Studio the VCC EW Set Variable Module Properties should not exceed 2k.
Integration
The Integration node allows communication with an external web service API and is one of the most powerful features of Inference Studio.
TIP
API integrations are presumed to be RESTful web services using JSON. The following web services require additional scope and effort to support.
- SOAP-based web services using a namespace prefix, CDATA tags, or Web Services Security (WSS)
- Encryption or hashing performed in the request body (other than TLS)
- Data transformation
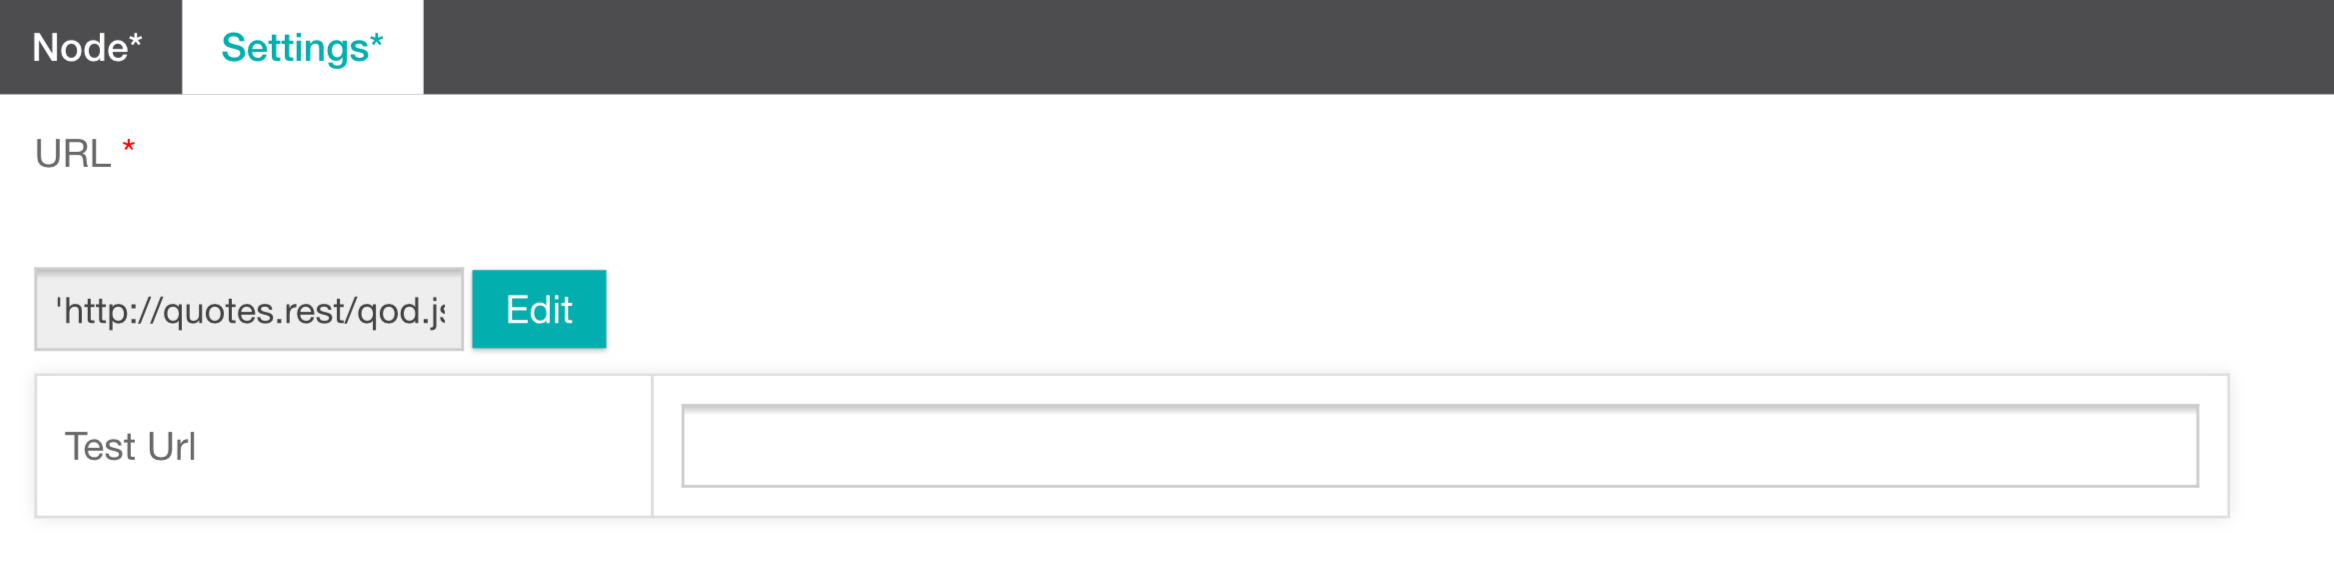
For this example we are going to connect to the Quote Of the Day API. Just as it sounds, this will return the quote of the day each time a request is made.
URL
- Enter the full URL of the Restful API that you are accessing by selecting the Edit button.
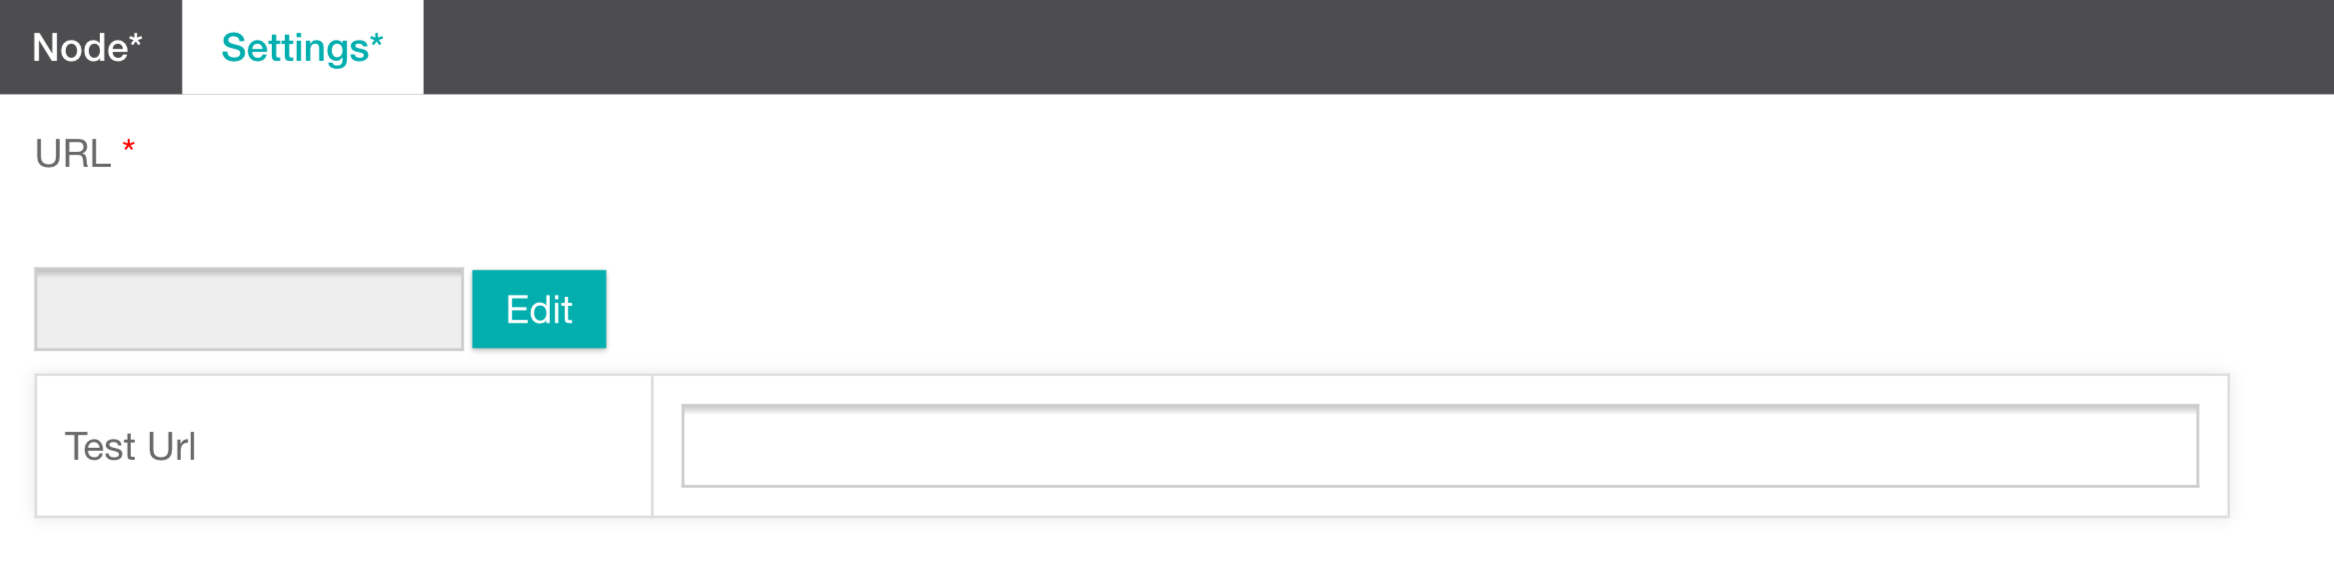
- You will be taken to the Expression Builder.
- Select the Text button and enter the URL 'http://quotes.rest/qod.json'
- Select Apply.

- You will see that the URL has been added.
Authentications
- If authentication is required for the API you are accessing you will need to specify the Auth Method in the Authentications section. The Integration node supports both Basic and Digest authentication methods, which can be selected from the dropdown menu.
You can also choose to enforce an SSL certificate and SSL Key for the web service connectivity.
We don't need any Authentications for our Quote Of the Day API. So just leave it blank.

Secure Variables
Secure values such as for an API Key or password can be passed through a secure variable. For example, create a secure variable called API_KEY and use the integration node to pass the parameter key and value, where the value is the value of the secure variable.
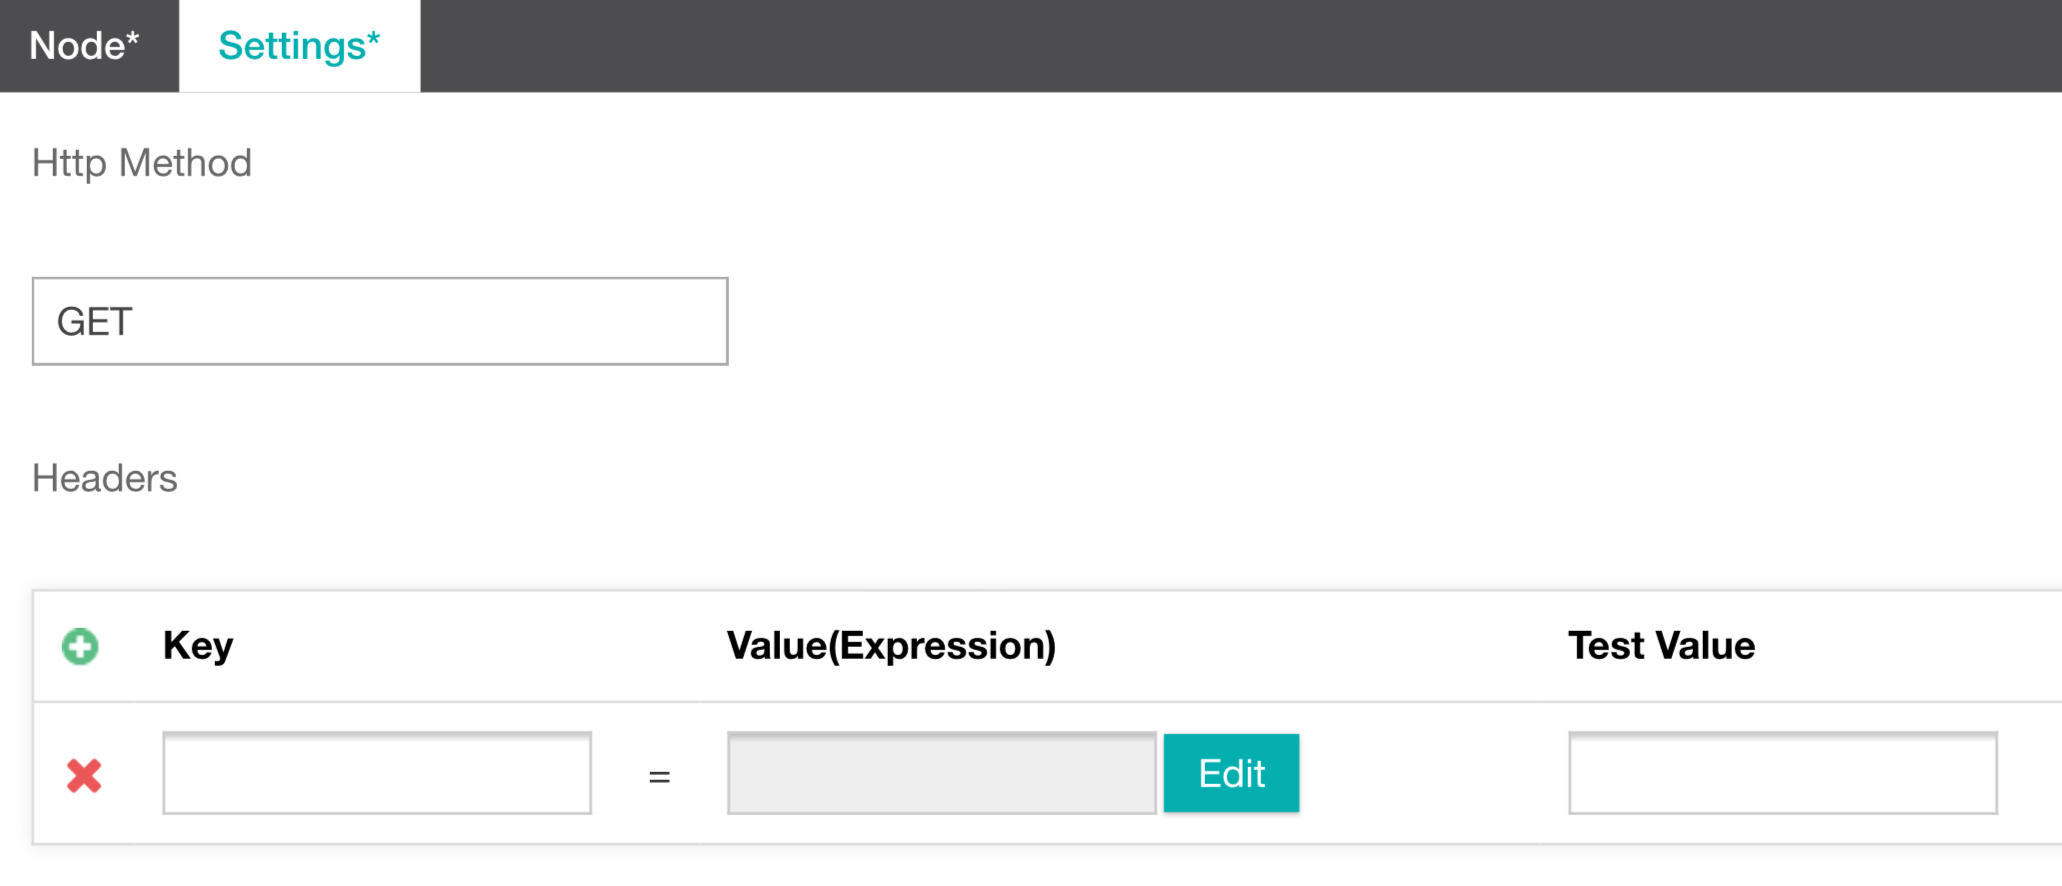
Http Method
- Select the Http Method you would like to use. The Integration node supports the following http methods:
- GET - Commonly used to retrieve information only.
- POST - Commonly used to post an array of data to a URL
- PUT - Commonly used to update a file or resource.
- DELETE - HTTP Delete is commonly used to issue a delete command via HTTP
- POST As JSON - Your parameters will be passed inside of a JSON array
- POST RAW DATA - Manually build your entire query (Advanced Users)
- PATCH As JSON - Your parameters will be passed inside of a JSON array
- PATCH RAW DATA - Manually build your entire query (Advanced Users)
- PUT RAW DATA - Used to manually update an entire query (Advanced Users)
Leave this set to GET for this example as we are requesting data from the Quote Of the Day API.
Headers
- Headers can also be added to each interaction performed by the integration node. This can be useful where the API you are integrating with requires parameters to be passed inside of the HTTP header, perhaps for tracking or security purposes. This can be provided as a Key or Parameter Name.
For the Quote Of the Day API we do not need to provide any Headers.
Parameters
- From the Parameters section select the Preview Test XML button. If your preview is successful, the API you are calling will return a collection of data. The XML preview is broken into two sections. The first section is the HTTP Header information and the second section is the Body. You can select an Xpath from either the Header or the Body.
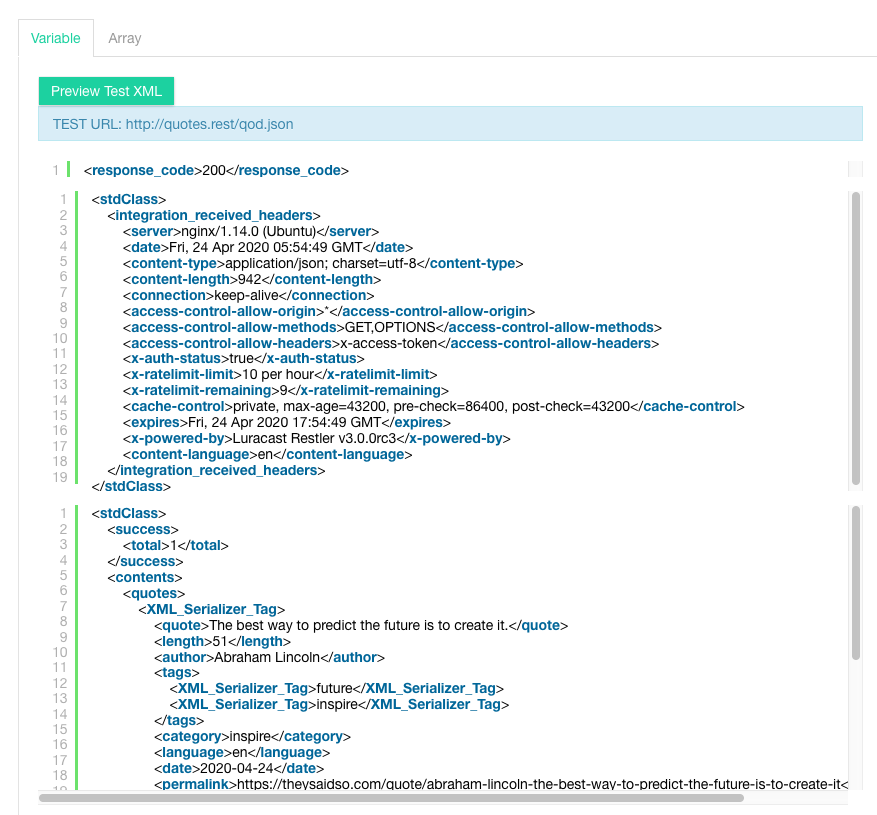
TIP
The integration node will always return this information as XML, regardless of the format that the API returns the data in. If the API you are calling is returning data in JSON format, this will be converted to XML. This will allow you to select specific paths inside the XML document which can then be applied to variables inside Studio.
- To select a specific Parameter simply click the parameter inside the preview XML document. Studio will automatically extract the XPath for that parameter. Let's select the
<quote>XPath.
What this is basically doing is saying "give me the data just for the quote section so I can something useful with it and ignore the rest of it for now".
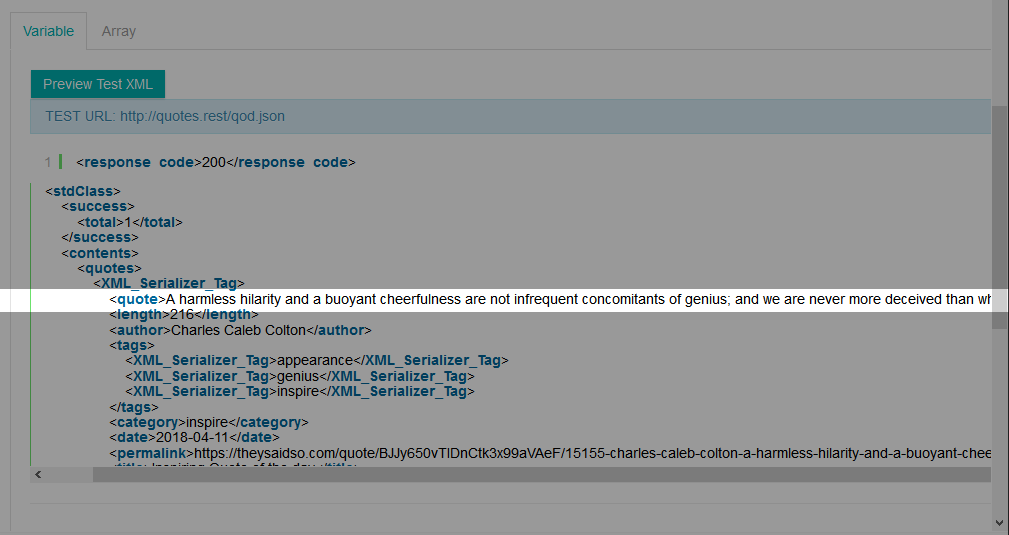
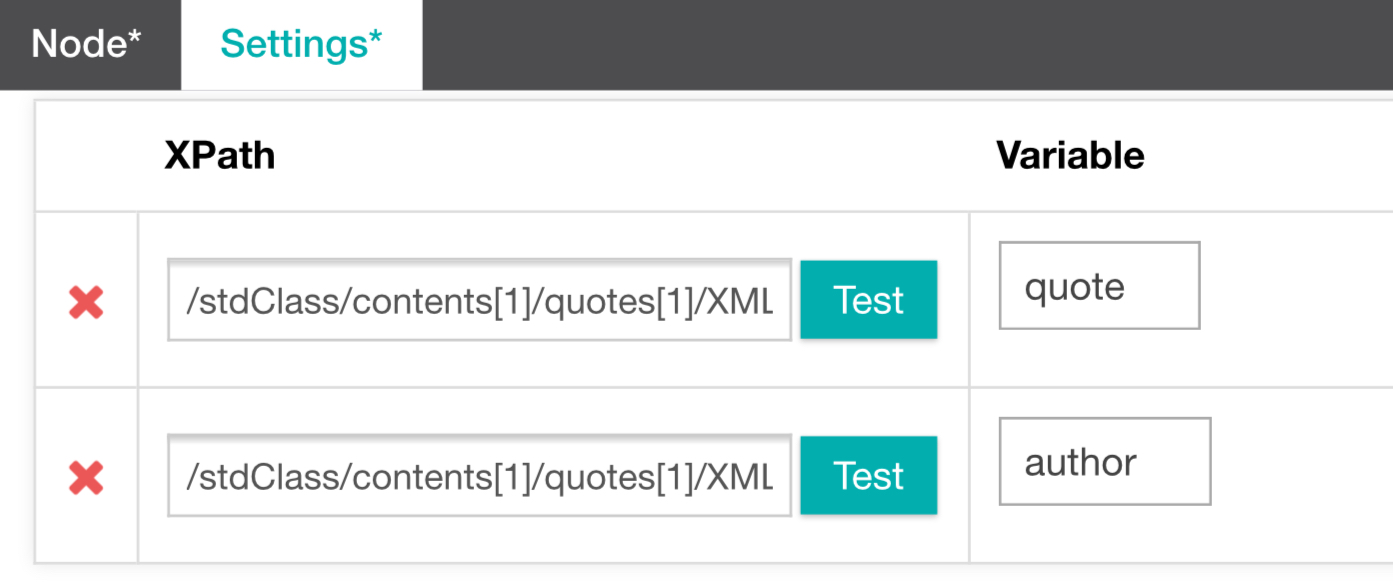
Return Values - Variable
- Variable) The Xpath can then be assigned to an existing variable or to a == NEW VARIABLE == from within the Variable tab.
To assign the Xpath to a new variable you will also need to provide a variable name. Let's assign the quote XPath to a new variable called "quote".
- Variable) Select the Add Return Value button to complete the variable assignment.
- Variable) Repeat the Steps 11 to 13 again, this time for the
<author>XPath. And assign it to a new variable called "author".
You should now have a variable called quote which contains the quote data and a variable called author which contains the author data.
Return Values - Array
A more complex example is assigning an Xpath to an existing array or == NEW ARRAY == within the Array tab. By assigning to an array it means you can return and assign all instances of a particular XPath rather than just a single instance.
- Select the Arrays tab.
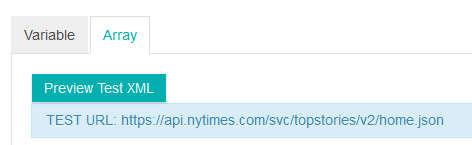
TIP
An example of this is if we were using the NY Times API. Here we could fetch all of the current breaking news titles and assign them to an Array. In this case, if we were using a variable instead of an array, we would have to go through the entire Xpath data and assign each section one by one. This would be very impractical and time consuming.

- Array) To assign the Xpath to a new array you will also need to provide an array name. Let's assign the Title XPath to a new array called "Title".
- Click Add Return Value. The title Xpath is now assigned to the Title array.

Fetch Timeout (Seconds)
- Specify the Fetch Timeout (Seconds) . You can either leave it as the == Platform Default Value == or specify your own timeout period. The Fetch Timeout is the amount of time allowed to retrieve data from the API request.
Music on hold
- Upload an audio file for Music on hold. The maximum file size is 1MB. We won't be providing any for this example.
- Finally, select Save to finish building your integration node.
IntelliSMS
The IntelliSMS node allows you to integrate SMS messaging into your Studio IVR call flows. IntelliSMS is a vendor node, it is supplied in conjunction with IntelliSMS, an Inference Partner. Vendor Nodes Vendor nodes are not automatically added to your account. If you would like to use this node please contactsupport@inferencesolutions.com and it will be added to your account. Note that this node requires you to have an IntelliSMS account. If you would like assistance in setting up a IntelliSMS account please contact your account manager. Once you have setup an account with IntelliSMS you can enter your profile details via IntelliSMS profiles. This can be configured via the IntelliSMS Profiles menu item found under Global on the Inference Portal navigation menu. For more information on how to configure Intellisms profiles, see this link. Using the IntelliSMS node in a Task
Select the profile that you have created for IntelliSMS. You can test the node at any point by clicking 'Send Test SMS', this will use the values shown in the 'Test Value' column.
The values above will be prefilled based on your IntelliSMS profile that has been previously created, with the exception of Recipient Number and Message. Enter a valid recipient number in to the Recipient Number field. This can be statically assigned, or retrieved from a variable. Enter your SMS message into Message. This is the outgoing sms text that will be sent to your recipient.
When triggered, the IntelliSMS node will return a number of API variables that you can use within your task. These are Document ID, Recipient, Message Status and Status Description. There is no need to use any of the returned values but they can be useful in some circumstances. You can assign the returned API variables to new or existing variables within your task.
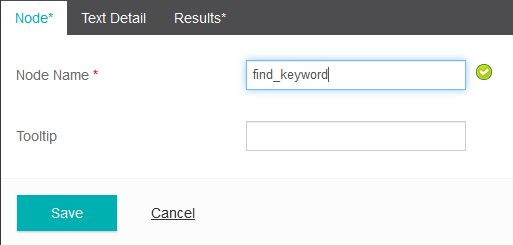
Keyword Finder
The Keyword Finder node makes it easy to match keywords or extract information such as email addresses and account numbers from unstructured text. This node works in conjunction with the Open Speech node.
- From the Node tab, provide a new Node Name. We will call ours find_keyword.
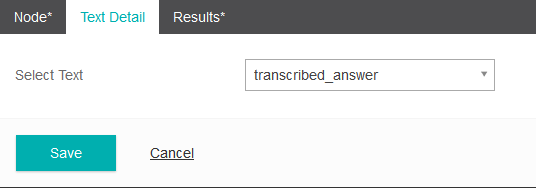
- From the Text Detail tab select the Variable that contains the text you wish to search. For a Messaging task this could be an SMS message or for a Voice Task this will normally be the variable used in your Open Speech node.
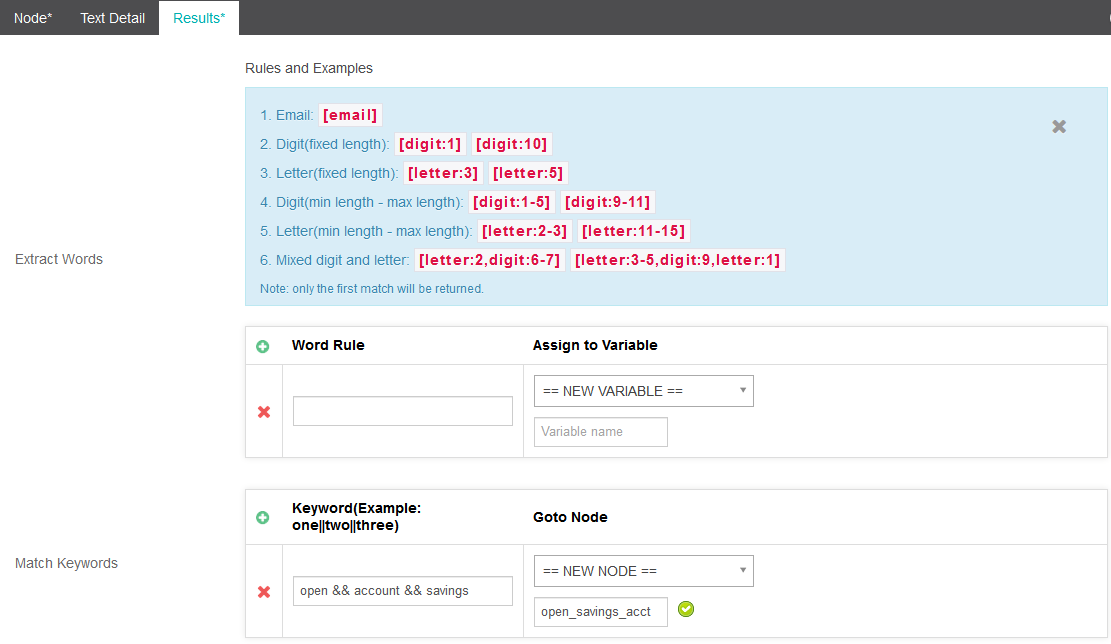
- Select the Results tab. From here you can Extract Words and Match Keywords by using Word Rules.
- Under the Word Rule column add a rule.
TIP
You can select the Rules and Examples link at the top to see common use cases.
- For this example we will Match the keywords Open && Accounts && Savings. The && denotes that the match must contain all three words for it to be a match.
- Select an existing node from the dropdown menu under the Goto Node column or select ==New Node== and provide a name. We have called our node open_savings_acct.
To add additional word rules select the green + icon. To delete word rules select the red X icon.
Link
The Link node allows you to link a current task to another task that is available within the same account. By using multiple link nodes you can split a very large Call Flow into a series of smaller ones connected by link nodes.
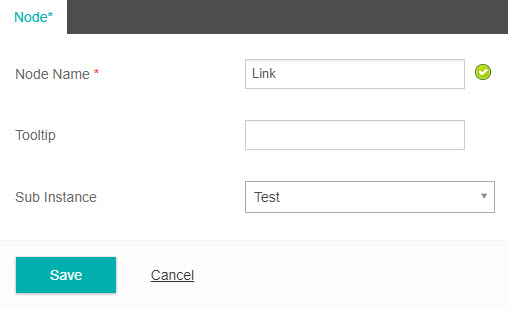
- Provide a new Node Name. We will call ours link_node
- From the Sub Instance dropdown menu, select the Task you would like this node to link to. We will link ours to the SMS_demo task.
- Select Save.
Log
As the name suggests, the Log node allows you to log data in real-time at any place in your task. The data that is logged can be viewed by going to the Task tab and selecting Log data under the Task level setting. The logged data can also be used for generating custom reports. Refer to "Task Reporting" for more details on how to use log data for generating custom reports.
- From the Node tab, provide a Node Name. We will call ours, log_weather.
- From the Log tab, provide a name for the Event that you want to log data for by selecting the Edit button and entering an event name using the Expression Builder.
- Provide the Parameters you want to log by selecting the Edit button and selecting the variables that you want to log. We have chosen to log data for the weather_status and weather_city variables from our Integration Node.
- Select Save.
Menu
Menu nodes are one of the more commonly used nodes in a traditional IVR. Menu allows the caller to be directed down one of several paths based on their inputs or responses.
Inference Studio allows menus that support both touch tone (DTMF) input as well as spoken input (ASR).
Each possible direction or branch that splits off from the Menu is referred to as a Subnode.
TIP
There is no physical limit to the number of Subnodes that can be attached to a menu but it is recommended not to exceed seven (7) as this will provide for a better IVR experience. Usability research suggests that the average caller will allow around 7 choices (Subnodes) before they will choose to abandon a call.
When creating a Menu node you will need to complete a number of different fields
Node
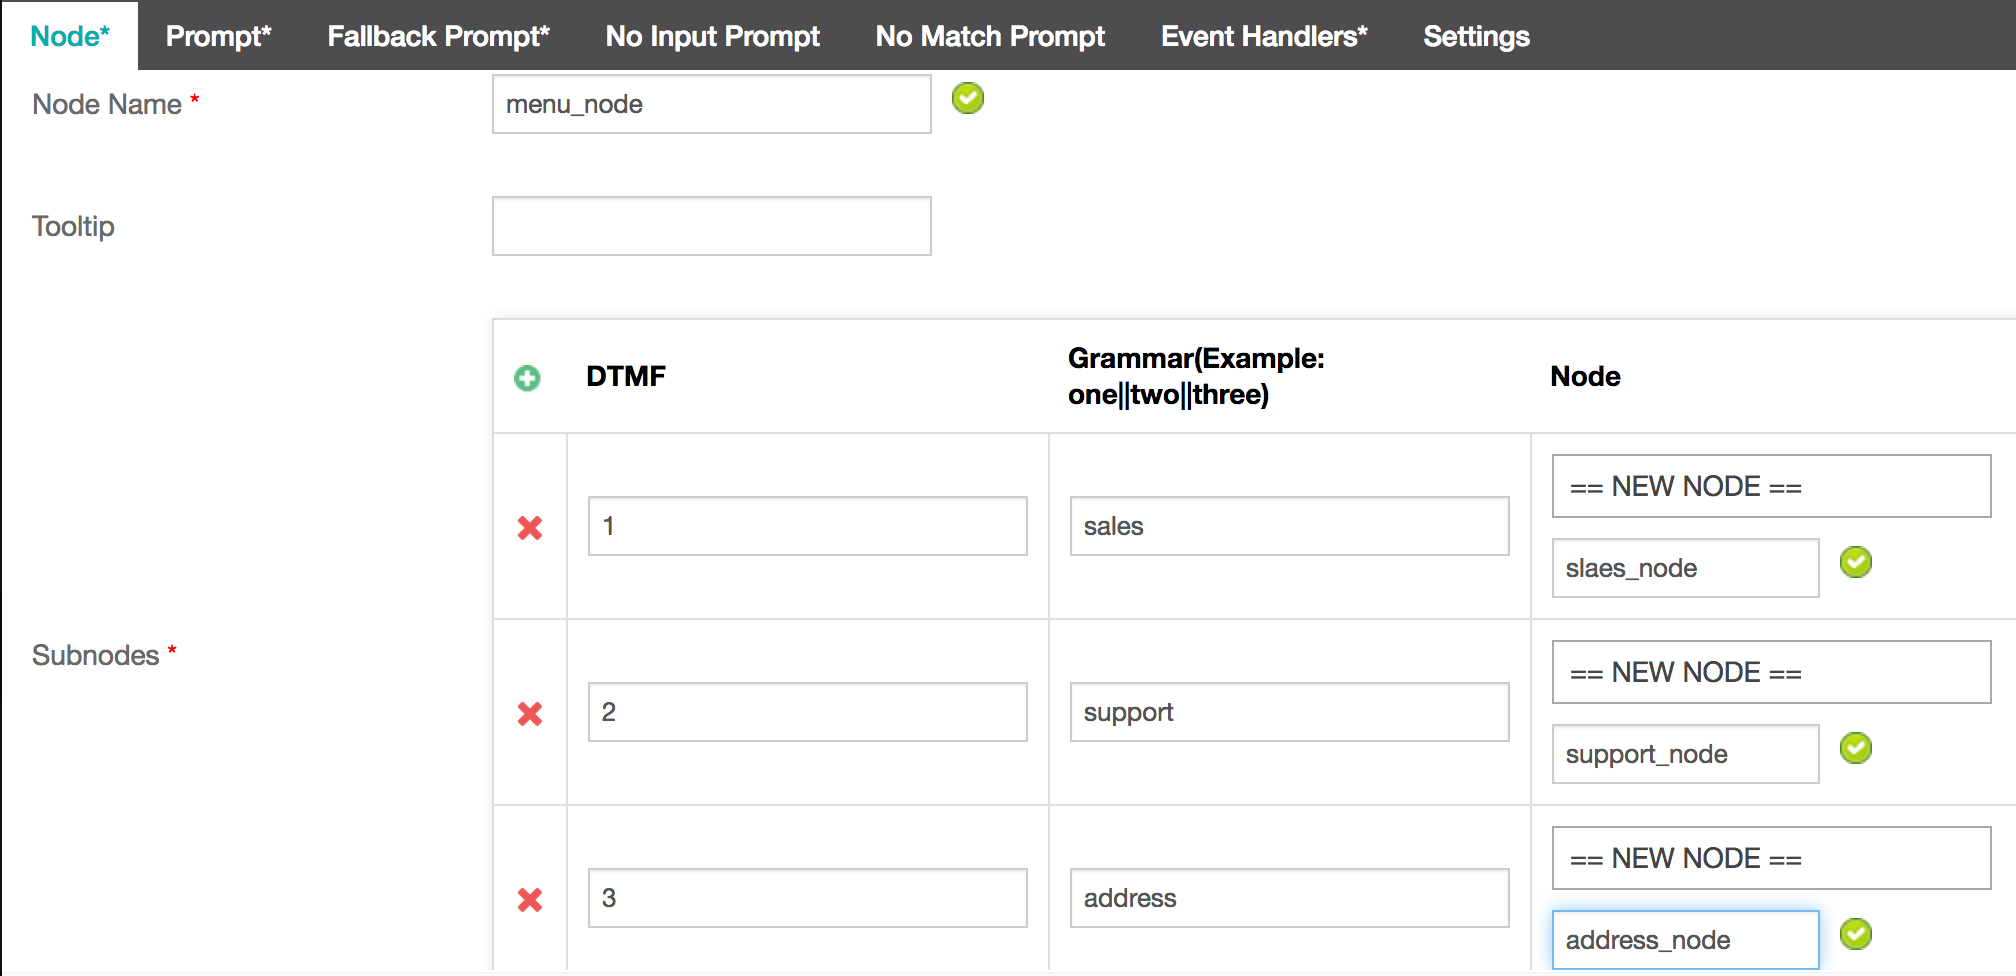
- Provide a Node Name for your menu. We have called ours Main_Menu.
- Fill in the DTMF options. Enter "1" under the DTMF column and "Sales" under the Grammar field. Note: To separate multiple Grammar options use the double pipe character ||
- Select an existing Node from the dropdown menu or select == NEW NODE== and provide a name. We have called our first option Sales. To add additional subnodes select the green + icon. To delete subnodes select the red X icon.
- Repeat steps 2 and 3 for each Subnode you require. We have created 3 subnodes to divert the caller to either Sales, Support or Address based on their selection.
TIP
What this is all basically means is that if the caller enters "1" or says the word "Sales" they will be directed to the node by the name "sales_node". If they enter "2" or say the word "Support", they will be directed to "support_node" and if the enter "3" or say the word "Address" they will be directed to "address_node".
Prompt
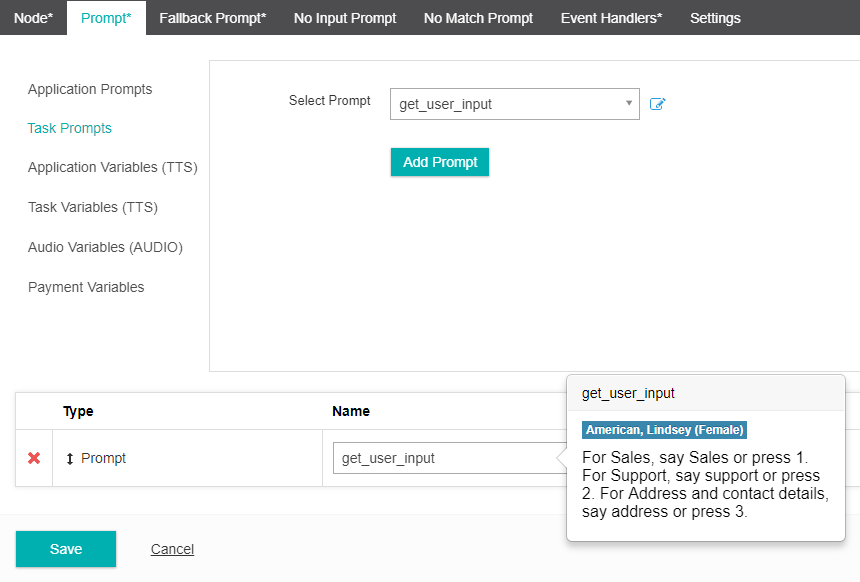
- Next, click on the Prompt tab. This tab allows you to configure the initial prompt that you want to play. In the Select Prompt drop down list, select == NEW PROMPT==.
- You will be presented with the "Add Task Prompt" interface. Enter a name for the prompt. We will call our prompt - get_user_input. Leave the default values for Language and Voice columns. In the TTS column we will enter the following text for our prompt - Please press 1 or say "sales" for sales inquiries or press 2 or say "support" for support. If you want the address and contact details please press 3 or say "Address". Click on the "Add" button to add the prompt. You will be returned to the "Edit Node" interface. Click on the "Add Prompt" button to add this prompt as the main prompt for the menu node.
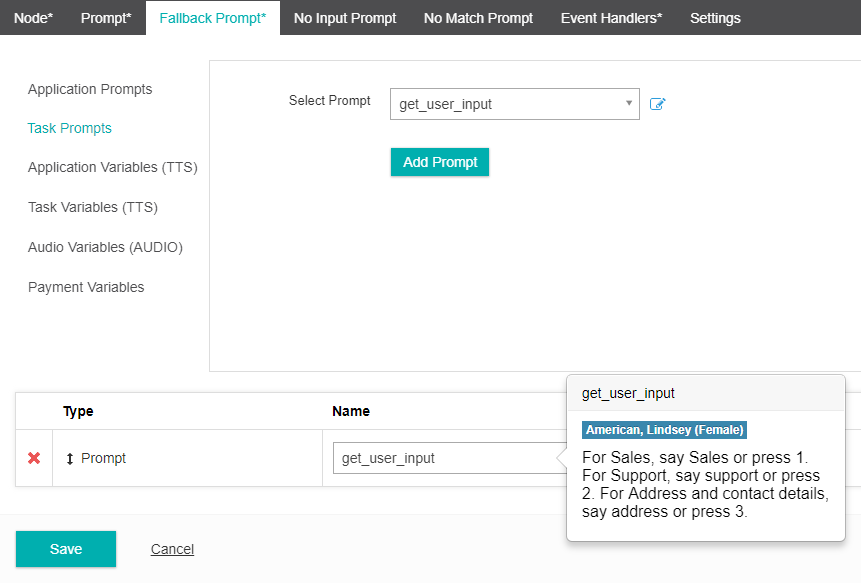
Fallback Prompt
- Click on the Fallback Prompt tab. The Fallback Prompt is played in the event a caller does not provide input or is not understood. With a Fallback Prompt we can provide context sensitive help to the caller. In this example we will use the same prompt as the Main Prompt so we can give the caller multiple attempts to enter a relevant selection. In the "Select Prompt" dropdown list, select the prompt that we defined earlier, get_user_input and select Add.
No Input Prompt
- This prompt will play if the caller does not provide any input, whether it be a Grammer response or DTMF. The Fallback Prompt will then play to direct the caller to provide a new input. Follow the same process as adding the main Prompt in steps 2 & 3.
No Match Prompt
- This prompt will play if the input provided by the caller is not understood by the system. The Fallback Prompt will then play to dire ct the caller to provide a new input. Follow the same process as adding the main Prompt in steps 2 & 3.
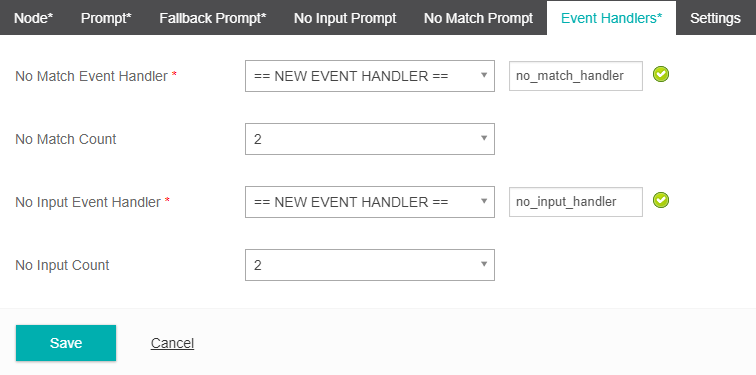
Event Handlers
An Event Handler will come into effect if a set number of No Input Prompt and/or No Match Prompt events occur. It is designed to direct a caller to an alternate area if their inputs are either not being heard or understood by the system.
- Select the Event Handlers tab. Event Handlers are used when there is still no match or no input detected after multiple attempts from the caller. In the No Match Event Handler drop down menu, select "==NEW EVENT HANDLER==" and give it a unique name. We will call ours - no_match.
- Leave the No Match Count to the default value of 2. This value tells Studio after how many attempts should it trigger the event handler. Repeat the same steps for the No Input Event Handler and define a new event handler. We will call ours - no_input. Leave the default value of 2 for the No Input Count field.
Settings
- Select whether your task should allow Bargein or not. Bargein allows the caller to interrupt the system and key ahead to the next prompt. This can be a great feature as it enables experienced users to move rapidly through the system to get to the information that they want. However, there will be cases when you may want to disable bargein. e.g. When your prompts or menu system have changed recently.
- Confidence Level is the systems confidence when interpreting an input from a caller. The higher the confence level, the more accurate the callers inputs must be.
- Interdigit Timeout (Seconds) refers to the timeout between DTMF key presses from a user. The longer the timeout the greater the allowable time between each key press. The platform default value is two seconds.
- Grammar Mode allows you to turn off grammar detection and only allow DTMF inputs. The default mode is Speech Grammar enabled.
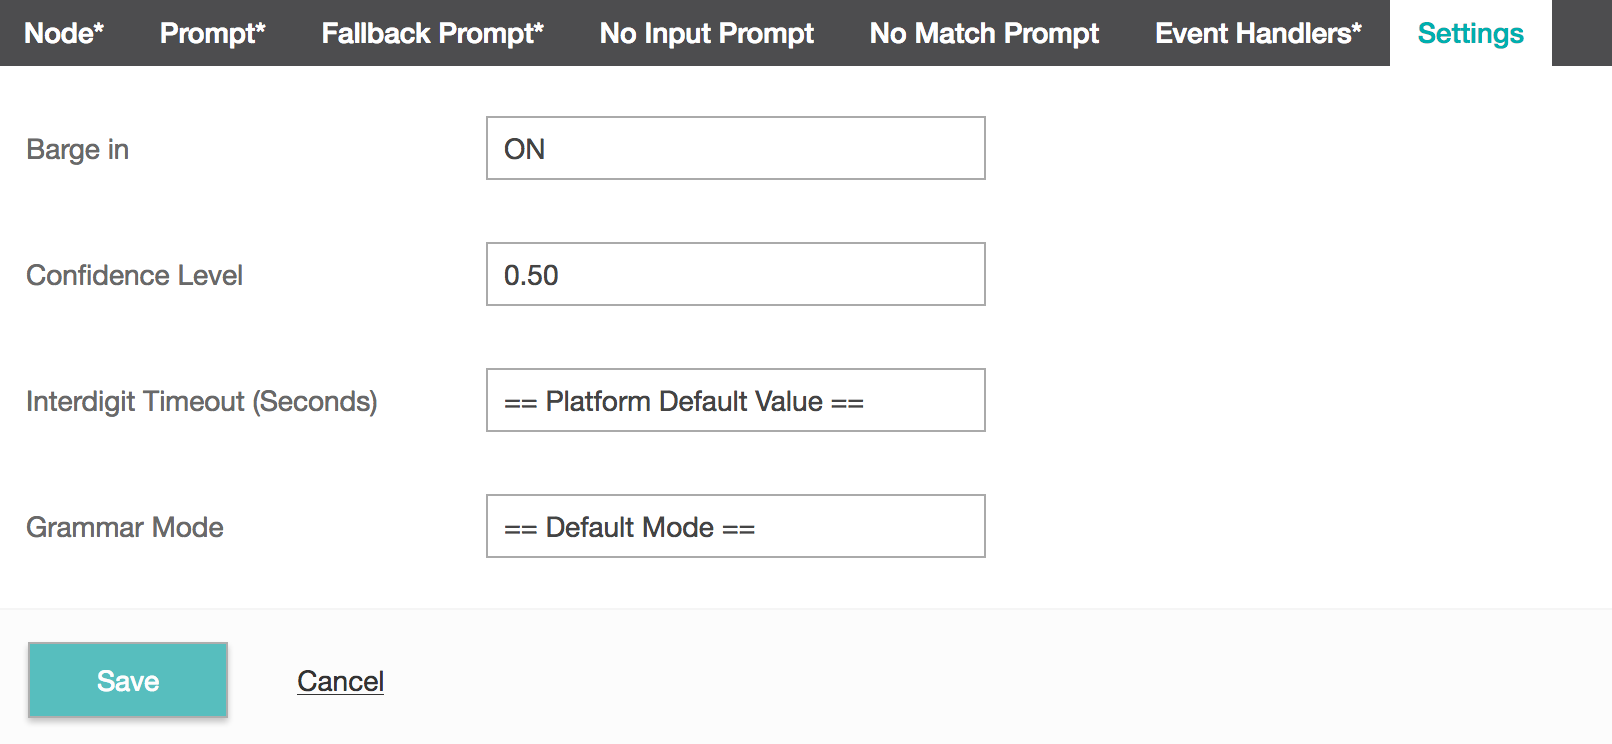
- Click Save.
Open Form Node
Studio 6.4
Phrase hints in Open Form node now supports the use of variables.Studio 6.1
Open Form introduced in Studo 6.1TIP
Phrase hints with Open From nodes do not allow the use of special characters. If you are using a variable value or text which contains special characters, those characters will be ignored.
Note: the characters $ and _ are exempt from this rule and are allowed within phrase hints.
Open Form nodes offer a mechanism to interpret user input using an open conversational style dialog. It offers a streaming interface with Google Dialogflow to transcribe and interpret user utterances in real time. This allows you to capture caller’s input via a form in a faster,more natural way and in multiple languages.
Open Form node also allows you to use you custom form types and offer a closed grammar style recognition. This is especially useful when you want to use speech recognition in languages other than English.
Open the tutorials for more on using the Open Form Type and the Open Form node.
Open Speech
The Open Speech node allows you to transcribe user utterances with silence detection and store the transcribed text as a variable.
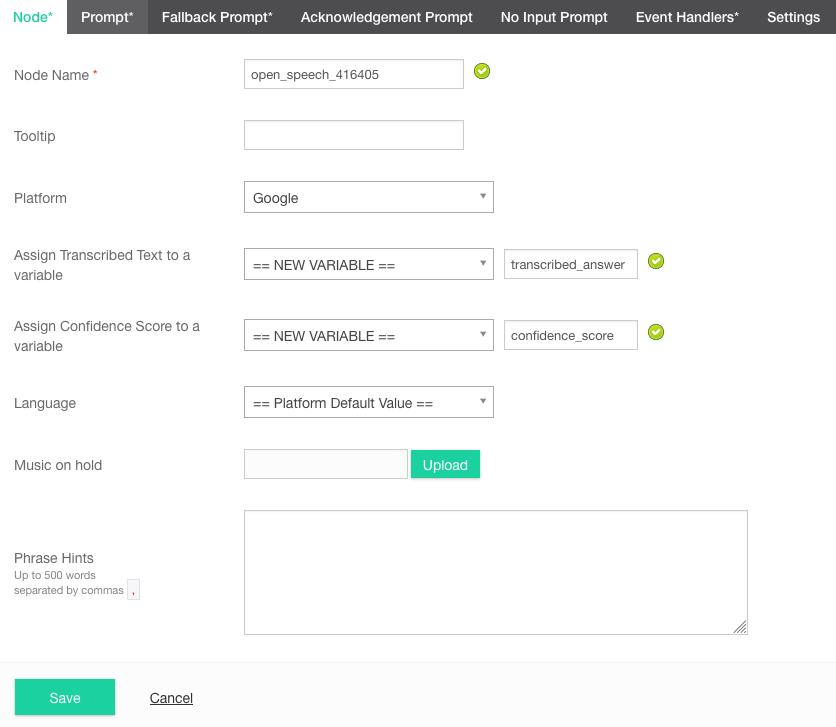
Node
- Provide a Node Name. We will call ours Transcribe.
- Select which open speech platform you would like to use. Studio currently support Google and IBM Watson.
- In the Assign Transcribed Text to a variable section you will need to select where the transcribed text will be saved. This can be an existing variable or a new variable. We will assign it to a new variable called transcribed_answer.
- You can also assign a confidence score to a variable. This can be useful if you only want to use transcriptions that have a high confidence rating. This totally depends on the type of task you are building. We will assign it to a new variable called transcribed_answer.
- You can select a Language or leave it as the platform default.
- The Music on hold section is the sound that will play each time an audio input is being transcribed by either Google or IBM Watson. The maximum file size is 1MB.
- (Optional) If you selected the Google speech platform you will also have the option to provide text in the Phrase Hints text box. These are comma
,separated words that help guide the speech analysis. This is helpful when you are expecting certain responses that might not be typically common e.g. location names such as Cities or Suburbs.
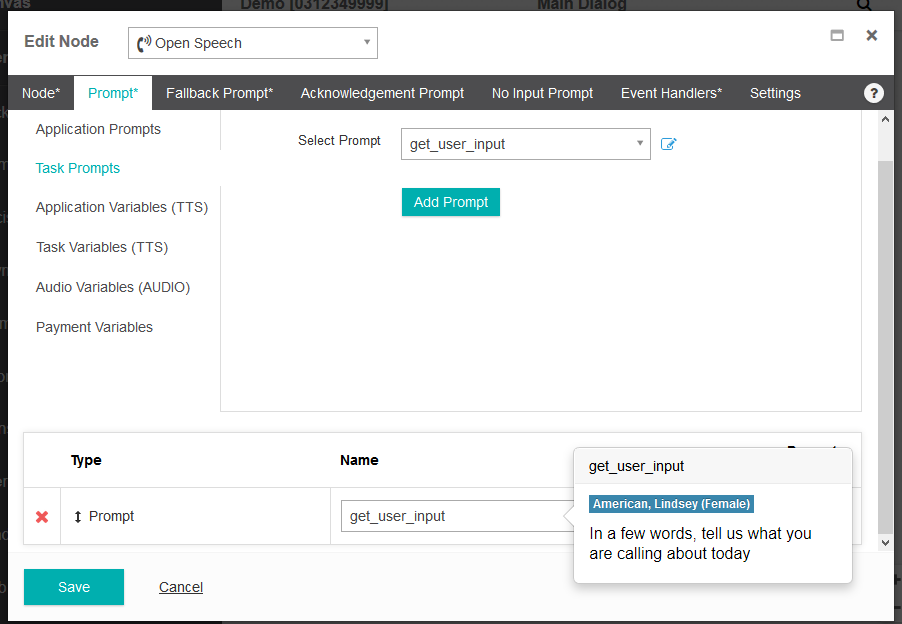
Prompt
- Next, click on the Prompt tab. This tab allows you to configure the initial prompt that you want to play. In the Select Prompt drop down list, select == NEW PROMPT==.
- You will be presented with the "Add Task Prompt" interface. Enter a name for the prompt. We will call our prompt - get_user_input. Leave the default values for Language and Voice columns. In the TTS column we will enter the following text for our prompt - In a few words, tell us what you are calling about today. Click on the "Add" button to add the prompt. You will be returned to the "Edit Node" interface. Click on the "Add Prompt" button to add this prompt as the main prompt for the menu node.
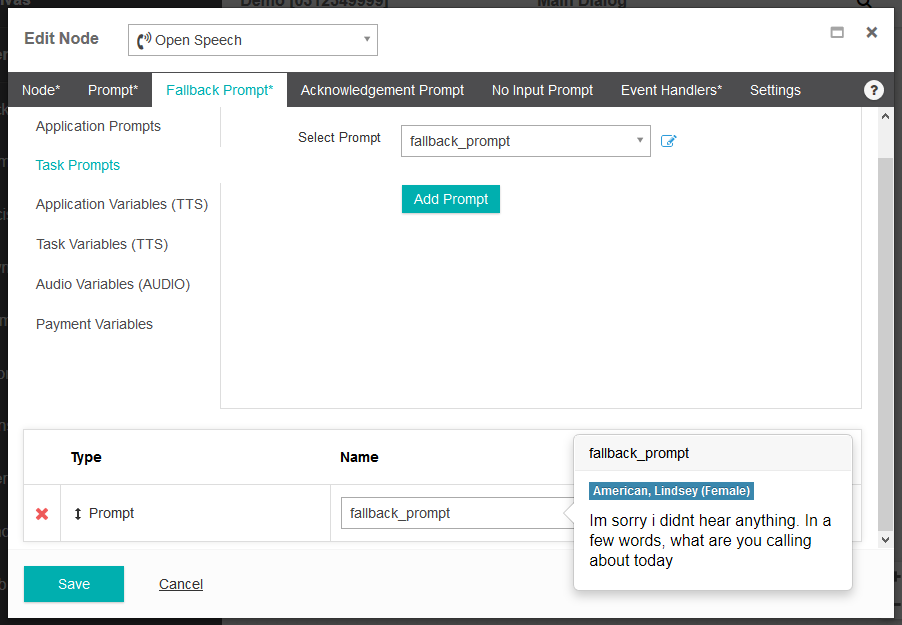
Fallback Prompt
- Click on the Fallback Prompt tab. The Fallback Prompt is played in the event a caller does not provide input or is not understood. With a Fallback Prompt we can provide context sensitive help to the caller. Provide a Fallback prompt and add it in the same way as the Main Prompt.
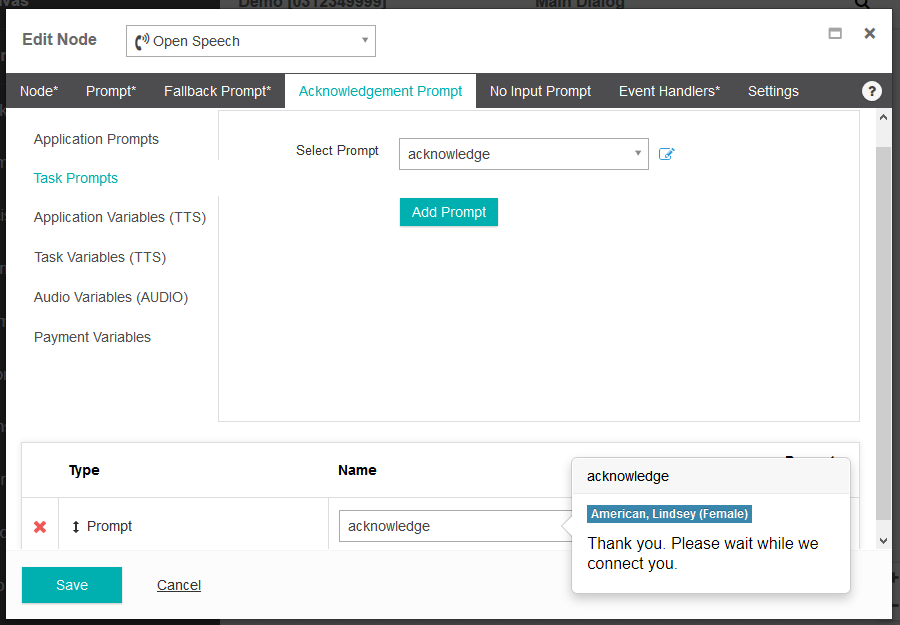
Acknowledgement Prompt
- Click on the Acknowledgement Prompt tab. The Acknowledgement Prompt is the prompt the caller will hear after their input has been received and the open speech begins transcription. The caller will only hear this prompt once. Following the acknowledgement prompt any call wait music will begin to play. The Acknowledgement Prompt is a good way to let the caller know what is happening. i.e. why they are waiting. Provide an Acknowledgement prompt and add it in the same way as the Main Prompt.
No Input Prompt
- This prompt will play if the caller does not provide any input, whether it be a Grammar response or DTMF. The Fallback Prompt will then play to direct the caller to provide a new input. Follow the same process as adding the main Prompt in steps 8 & 9.
Event Handler
An Event Handler will come into effect if a set number of No Input events occur. It is designed to direct a caller to an alternate area if their inputs are not heard or by the system.
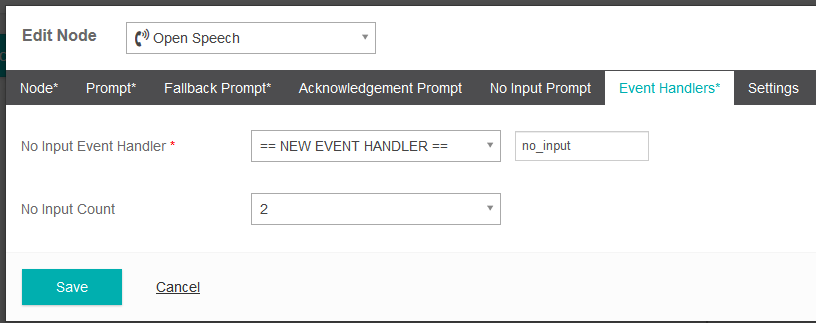
- Select the Event Handlers tab. In the No Input Event Handler drop down menu, select "==NEW EVENT HANDLER==" and give it a unique name. We will call ours - no_input.
- Leave the No Input Count to the default value of 2. This value tells Studio after how many attempts should it trigger the event handler.
TIP
There is no concept of a 'No Match' event in the Open Speech node as a caller's input is not being matched to any expected result. The open speech will always provide it's best attempt at the callers input.
Settings
- Select whether your task should allow Bargein or not. Bargein allows the caller to interrupt the system and key ahead to the next prompt. This can be a great feature as it enables experienced users to move rapidly through the system to get to the information that they want. However, there will be cases when you may want to disable bargein. e.g. When your prompts or menu system have changed recently.

- Click Save.
Pause
The Pause node allows you to pause the execution of a Studio voice task in order to synchronize prompts that may have been queued with any background activities that are being performed. Studio background processing nodes including for instance table lookup, datastore, and integration can all run in the background while prompts are playing. Each prompt is queued as processed, and the background processing nodes can then continue to execute after queuing. Input nodes automatically cause synchronisation before opening for user input.
To use the Pause node,
- Provide a name.
- Select a time in seconds from the Pause Duration dropdown. This time is perceptible to the caller, and is additional to whatever time background tasks must pause in order to synchronise with prompt playout.
- Click Save.
Play Prompt and Play Complex Prompts nodes can both be configured with this behaviour via the settings tab.
Payment
Studio 5.2
The Payment node is deprecated and has been replaced by the new Payment Process node.Payment Process
The Payment Process node allows you to make credit card payments via the phone and is PCI compliant.
TIP
Before you can use the Payment Process node you will need to have a merchant account. Studio supports merchant accounts with the providers listed in the Payment Gateway Profile documentation.
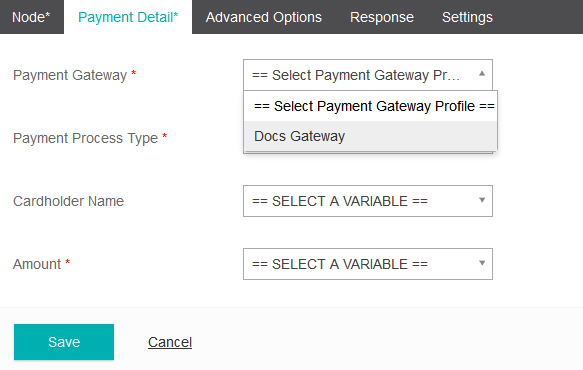
- First you will need to set up a Payment Gateway Profile in Studio.
- Now that you have set up your Payment Gateway Profile you can add the Payment Process Node to your call flow.
TIP
The Payment Process Node will depend on earlier capture of credit card number, expiry and CVC using the Form node with respective Form Types. These form types will make a number of system defined payment variables available, the text-to-speech values, and also allow specification of a variable to capture masked credit card number.
- From the Node tab provide a node name.
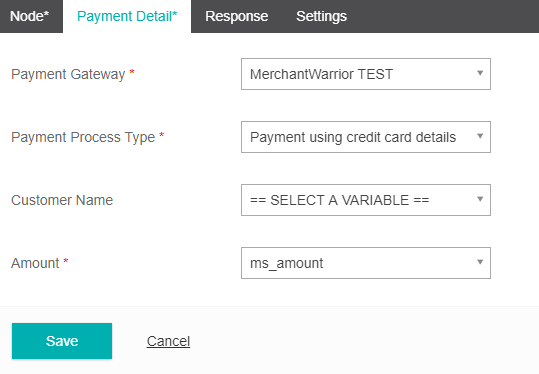
- Select the Payment Detail tab.
- Select your Payment Gateway you just created. Gateway specific features, for instance Authorize Only will be accessible once selected.
- Select the Process Payment Type. This may have one or more options depending on your specific merchant.
- Select the option Customer Name variable.
- Select the Amount variable. This is a required field. Some payment gateways require decimal values, others require whole number cents.
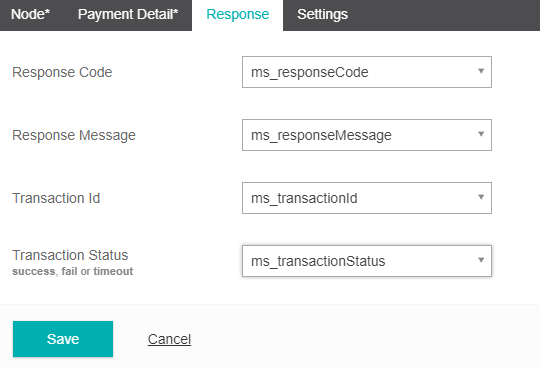
- Select the Response tab. This is not required but allows some greater functionality if you would like to send back additional information to the caller once a payment has been processed.
- For fields in the Response tab, you can select pre-existing variables or create new variable to store the various responses.
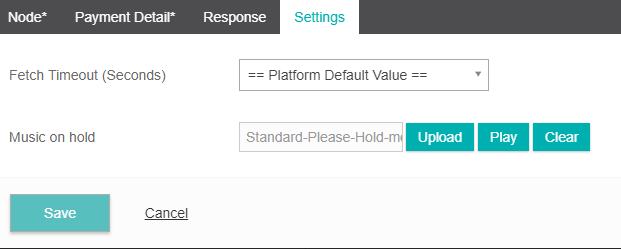
- Select the Settings tab. Here you can provide some additional control to the node by modifying the Fetch Timeout and including some on-hold Music.
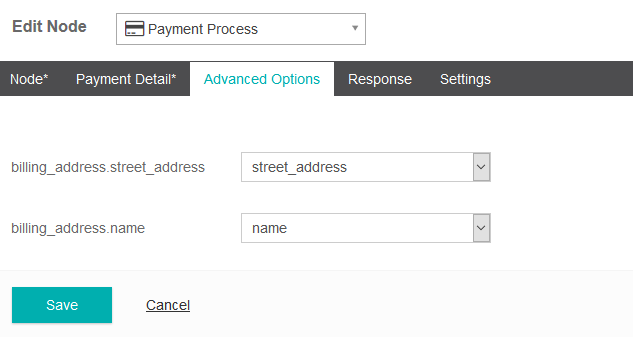
Advanced Options
Studio 5.3
You can now pass in custom credit card schema through your custom Payment Gateway Profile.TIP
Please note that in the Payment Process node, the Advanced Options tab will appear empty unless you have created a Custom Payment Gateway with Configurable Schema. Learn more here.
Once you have a Custom Payment Gatway you can select that gateway from the Payment Details tab which will allow access to variables in the Advanced Options tab.
Technical (integration status) and business (payment transaction result) vary from platform to platform. For instance, with the Authorize.net adapter the response schema transactionResponse.responseCode must be used to determine payment accepted/declined as covered within the Authorize.net documentation
- Under the Payment Detail tab, from the Payment Gateway dropdown, select the custom gateway you have already created.
- From the Advanced Options tab you can select any of the custom schema you created in your Custom Payment Gateway and assign it to existing or new variables from the dropdown menu.
Play Prompt
This node type plays a message to the caller, either by playing a recorded audio file or by using Text-To-Speech synthesis (TTS).
Add Task Prompt
- From the Prompts tab select Prompt, == NEW PROMPT ==
- Provide the text for the prompt in the text box.
TIP
Depending on which voice type you are using will change which values you can provide in the TTS box.
If you are using a standard voice type you will be able to type in plain text or paste in SSML.
If you are using a Google Wavenet voice type you will be able to use the advanced SSML Editor to fine-tune your prompts.
- Otherwise, if a task is not assigned TTS resources, you will need to upload an Audio File instead. Select Choose file > (Select the audio file) > Open. Note: You can choose to upload an audio file even if your task is currently assigned to TTS. As a default studio will always look for an audio file, if it finds it on the server it will use that instead of TTS. If no audio file is found it will use TTS.
Adding Task Level Prompts
You can also add new Task Prompts via the Task Level menu. To do this:
- Select Task from the top menu.
- Navigate to Task Level, and select the Task Prompts + icon.
Viewing Task Level Prompts
- Select Task from the top menu.
- Navigate to Task Level, and select the Task Prompts heading.
Settings - Pause Before Prompt
This setting forces prompt playout to synchronise with Studio task execution.
- No allows for the prompt to be queued and task execution to continue, for instance to pre-fetch information from an integration or data store lookup, or to make additional decisions based on existing data.
- Yes forces synchronisation, and Studio will pause until existing prompt playout has completed and this nodes prompt can be queued, at which point it will continue to execute while this nodes prompt plays.
Play Complex Prompts
The Play Complex Prompts node allows you to combine multiple prompt segments into a single node. Essentially it is a way of combining several prompts together.
TIP
Depending on which voice type you are using will change which values you can provide in the TTS box.
If you are using a standard voice type you will be able to type in plain text or paste in SSML.
If you are using a Google Wavenet voice type you will be able to use the advanced SSML Editor to fine-tune your prompts.
With a complex prompt node you can combine the following:
Application prompts - Prompts that are application wide.
Task Prompts - Regular prompts that are scoped at the task level.
Application Variables (TTS) - Variables that are application wide.
Task Variables (TTS) - Regular variables that are scoped at the task level.
Audio Variables (AUDIO) - When you record audio from a caller the content can be written to an Audio Variable. An Audio Variable can be written to a data store or emailed to a recipient.
A real world example of a Complex Prompt spoken to a caller
"Hello John, your account balance is $300.75. Please be advised that our branches will be closed on Monday 12th October due to a public holiday."
In this case:
- "Hello" - is a regular prompt.
- "John" - is a local variable given that it would be dynamically set based on identifying the caller.
- "Your account balance is" - is a regular prompt.
- "$300.75" - is a local variable that would be dynamically set based on identifying the specific account.
- "Please be advised that our branches will be closed on Monday 12th October due to a public holiday" - is an application prompt as the same prompt may appear in multiple scripts in the IVR.
Below is an example of a task prompt.

And a second prompt being added to the first to create a more complex prompt.

This nodes pause before prompt setting is identical to the Play Prompt node
Prompt Recorder
The Prompt Recorder node allows you to record audio prompts to be used within Inference Studio.
- Under the Node tab, provide a new Node Name.
- From the Prompt to record over section, select a Local or Global prompt from the dropdown menu. This will be the prompt that the new prompt will record over.
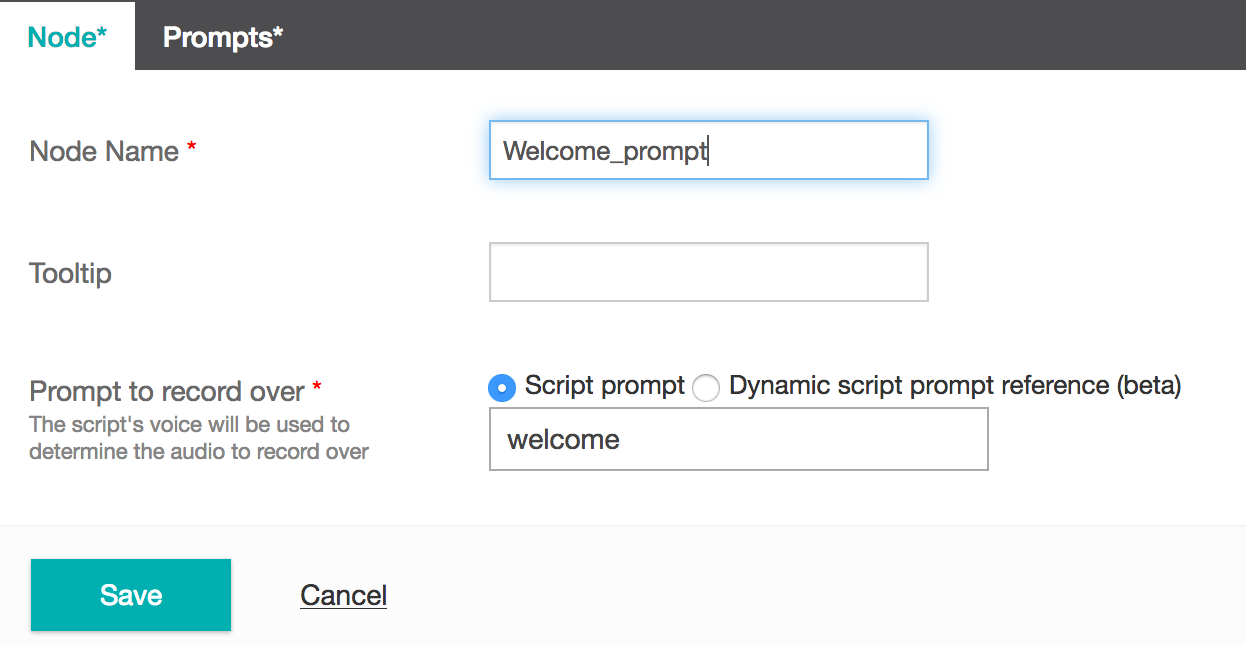
- Select the Prompts tab.
- Choose an existing prompt or create a new one by selecting == NEW PROMPT ==
QforMe Add to Queue
TIP
You will only see the QForMe Add to Queue node if your business account has an active QForMe service
- From the Node tab, assign a new Node Name. We will call ours add_to_queue.
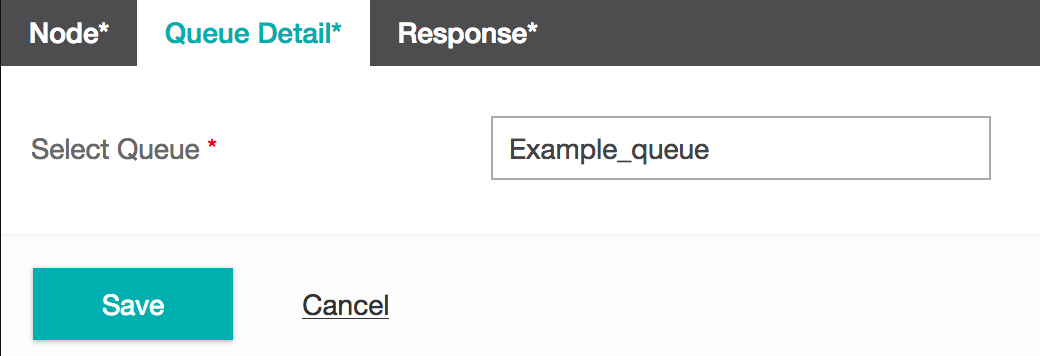
- Select the Queue Detail tab.
- From the Select Queue dropdown, choose the queue you would like to use. We will select our example_queue. If you are using QforMe Premium, your premium queue will have the letter (P) in the queue name.
- For the Check Waiter Token dropdown select the variable that contains your waiter token or create a == NEW VARIABLE ==. We will create a new one and call it waiter_token.
- From the Call Back Phone Number dropdown you can select a variable or assign to a new variable. We could provide a return call to the callers current phone number by selecting the ANI variable.
Studio 6.3
QforMe Premium was added in Studio 6.3 and is a premium addon.TIP
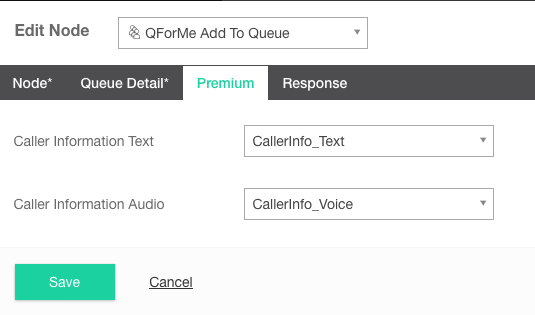
If you are using QforMe Premium, there will also be a Premium tab. From the Premium tab you can select from from the dropdown menus, the Caller Information Text and Caller Information Audio. These are the caller's details you want to pass through to the call center agent, such as the caller's recorded audio message. The agent will hear "press 1 to answer this call", and after they accept the call, will be played the Caller Information Text (if provided) followed by the Caller Information Audio (if provided).
Use the record node to obtain an audio variable.
- Select the Response tab.
- If you are using a Response Code as part of your QForMe Check Waiter node then you can use it here. If not, then just leave it blank.
- If you are using a Response Message as part of your QForMe Check Waiter node then you can use it here. If not, then just leave it blank. We will create a new variable called response.
- Select Save.

QforMe Check Waiter
TIP
You will only see the QForMe Check Waiter node if your business account has an active QForMe service.
The QForMe Check Waiter node allows you to check if a QForMe waiter is available as part of your callflow. This removes the need for using integration nodes and APIs to use QForMe as part of studio, making it a lot easier to use.
- From the Node tab, assign a new Node Name.
- Select the Queue Detail tab.
- Select the Queue you would like to access from the dropdown menu. We will select our Example_queue. If you have not yet made a queue you will need to do this before continuing. If you are using QforMe Premium, your premium queue will have the letter (P) in the Select Queue dropdown.
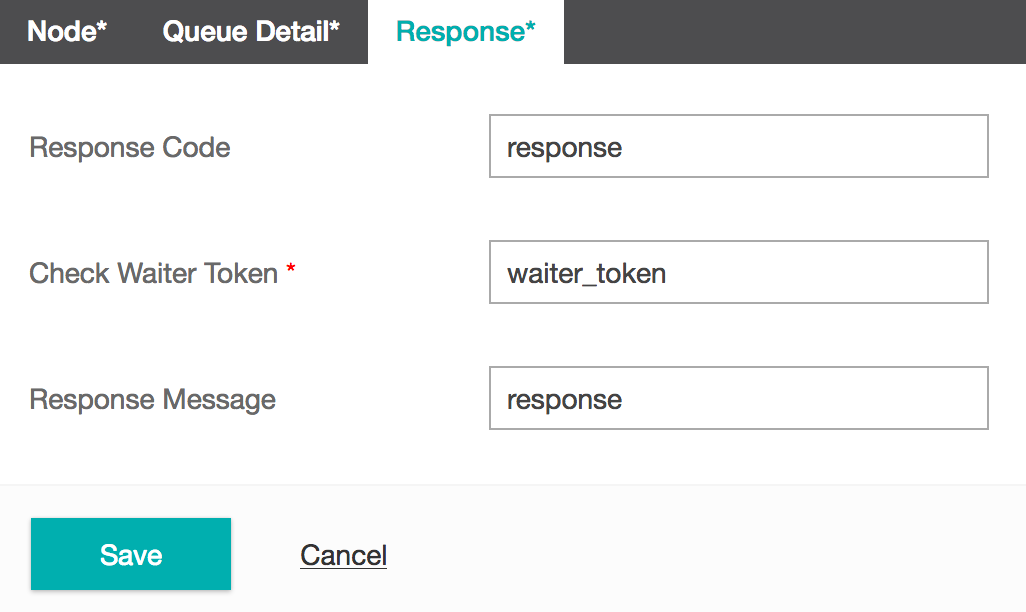
- Select the Response tab.
- From the Response tab you can assign the Response Code to a new or existing variable. This can be useful for debugging purposes but is not a required field.
- The Check Waiter Token basically allows you to assign a caller to a unique waiter, if one is available. This is a required field. We will select our waiter_token variable.
- The Response message is also not a required field but is useful in the event that a waiter is not available as it would allow us to communicate to the caller that there are no waiters available rather than just leaving them in the queue with no reason as to why. We will select our response variable.
- Select Save.
Record
The Record node allows you to record audio from a caller, which can then be saved as an Audio Variable. This is useful when recording things such as a caller's name for a voicemail service.
- Under the Node tab, fill in the Node Name.
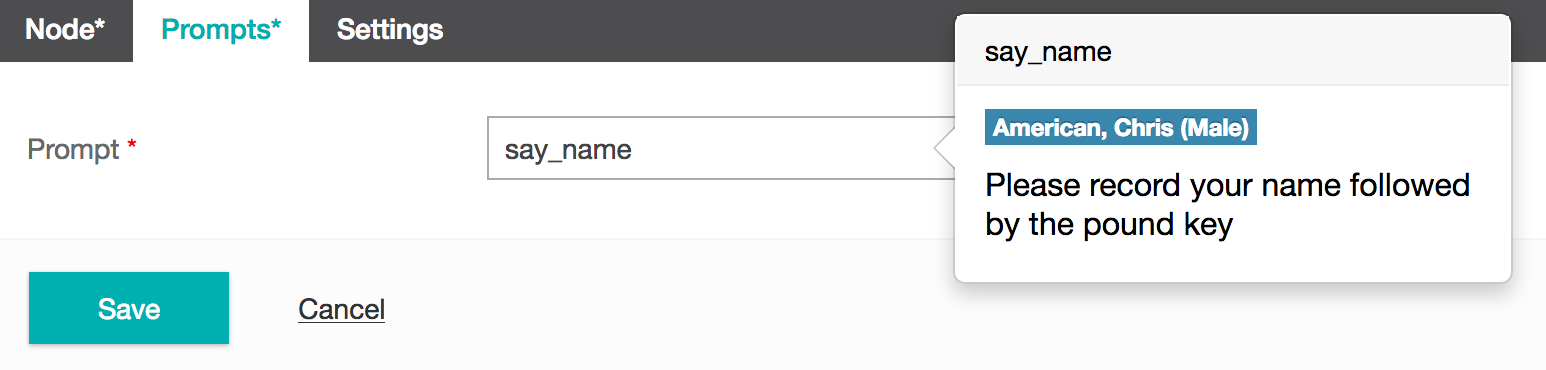
When using the record element you will need to provide a prompt to be played to the caller to tell them to leave an audio response for the recording. 2. From the Prompts tab select the Prompt you would like to use, or create a new one with new prompt. We will create a prompt that says Please record your name followed by the pound key.
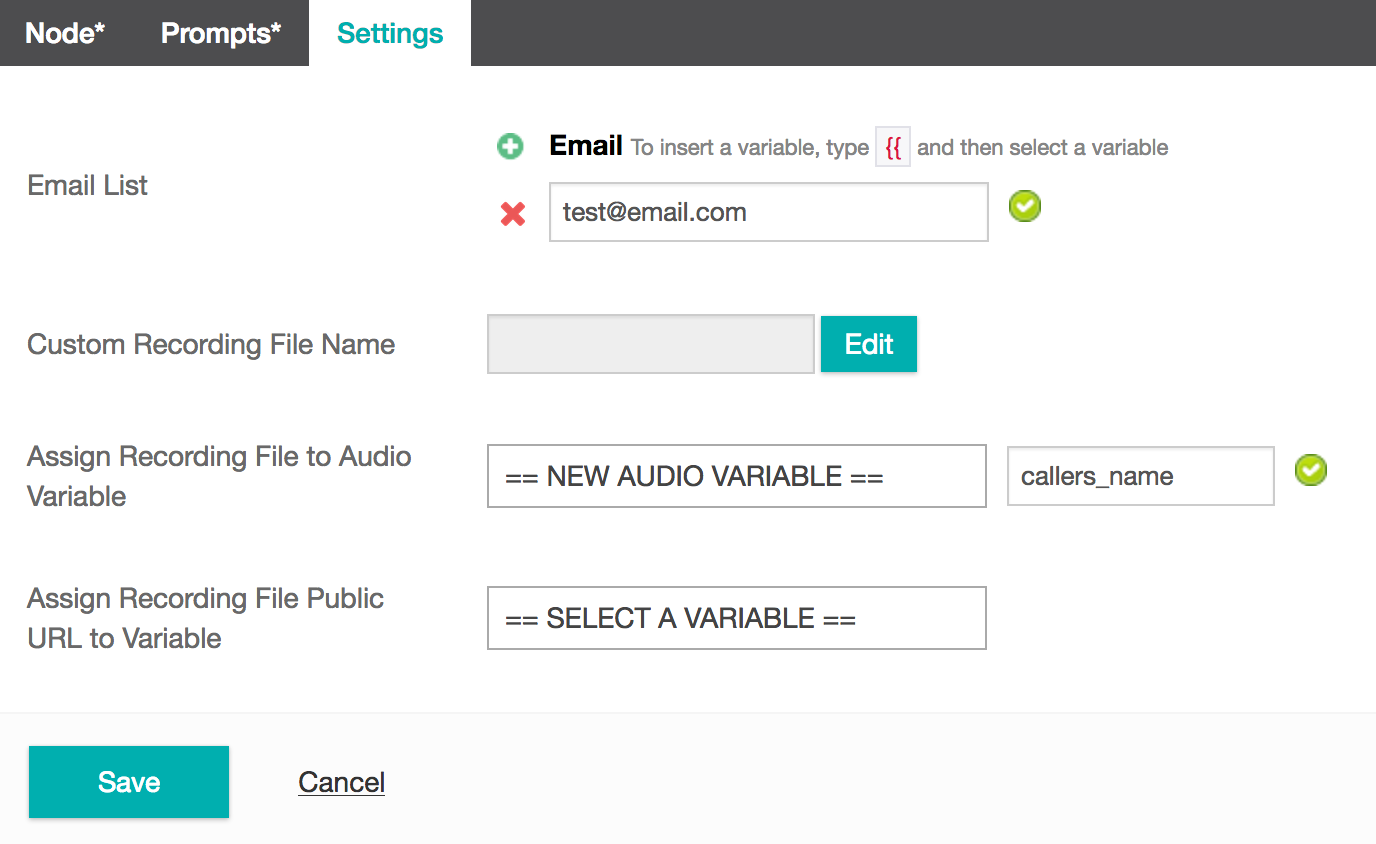
- The Settings tab allows you to specify what will happen to the recorded content. From Email List, include any email address(s) that you would like the audio recording to be sent to once it has finished recording. You can provide an email address manually or by from a variable using the
{{symbols. - You can also choose to Assign Recording File to Audio Variable by either selecting an existing variable, or by creating a new one. We have chosen to send the recording to our email test@email.com as well as save it as a new audio variable, which we have called callers_name.
TIP
By default, during a call the # key will terminates a recording. If no # key is pressed, the recording will continue for 30 seconds. If you provided an email address then once the recording is complete, the email will be sent. If an email address was not provided, then the recording will either be saved as an audio recording or audio variable.
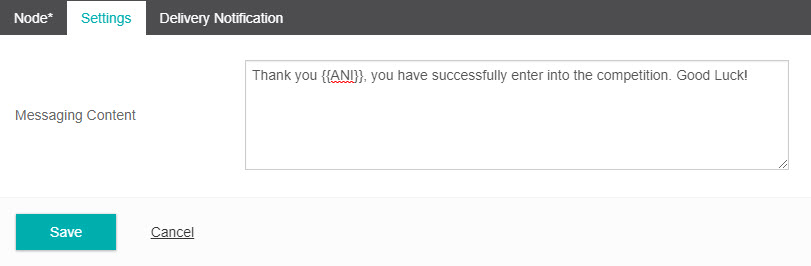
Reply Message
- Provide a Node name. We will just call ours reply_message.
- Select the Settings tab.
- Under the settings tab, complete the Messaging Content text box. This will be the content of your message.
- You can insert variables inside the Messaging content by using a double curly brace
{{followed by the variable name. In this example we are using the variable {{caller-name}} which is the name of the person we are responding to. - Select Save to finish creating the Reply Message node.
Reply SMS
- Provide a Node name. We will just call ours reply_sms.
- Select the Settings tab.
- Under the settings tab, complete the SMS Content text box. This will be the content of your message.
- You can insert variables inside the SMS content by using a double curly brace
{{followed by the variable name. In this example we are using the variable {{ANI}} which is the phone number of the person we are responding to. - You also have the option of receiving delivery notifications for your SMS. This feature requires you to host a webservice to receive the notifications events. To use this feature, click on the "Delivery Notification" tab.
- Enter the URL for your webservice in the Web Hook URL field. All notification events related to this SMS will be sent to that URL.
- You can pass additional parameters using the Query Params field to differentiate between the different messages that you send. These parameters will be included with the notification events.
- Select Save to finish creating the Reply SMS node..
Screenpop
Studio 6.1
Screenpop introduced in Studo 6.1The Screen Pop Transfer allows you to forward relevant customer information to a call center agent or sales representative while transferring the call. This is very helpful for maximising customer experience and minimising call time.
The Screenpop Transfer sends the data to the call center via an API URL. There are three different options available to generate a unique URL for a given call. These are detailed below.
DNIS Pool method
In this option, Studio will use a DNIS number from a pool that has been pre-configured. It uses a round robin policy and gets the next unallocated number from the DNIS pool. Once all the numbers have been used, it will reuse the number pool. Care should be taken to ensure the DNIS pool size is large enough for the call volume that is expected so that the same DNIS is not used for two calls that are transferred at the same time. To use this option, the URL to be configured in the call center client is https://www.inferencecommunications.studioportal.io/studio_instance/api/v1/screenpopdata/YOUR_API_KEY/DNIS/DNIS/format/FORMAT
To utilize the DNIS pool method you must create a DNIS pool in the Global Variables section. For more details on DNIS Pooling click here.
ANI only method
In this option, Studio will generate a unique URL by using the ANI of the caller. The call center client must be configured to open a web browser with URL configured to load from the call details. To use this option, the URL to be configured in the call center client is https://www.inferencecommunications.studioportal.io/studio_instance/api/v1/screenpopdata/YOUR_API_KEY/ANI/ANI/format/FORMAT
DNIS & ANI method
This option will use the DNIS and ANI to generate the unique URL. To use this option, you will need a DNIS pool configured similar to the first option. The URL to be configured in the call center client is https://www.inferencecommunications.studioportal.io/studio_instance/api/v1/screenpopdata/YOUR_API_KEY/DNIS/DNIS/ANI/ANI/format/FORMAT
Using the Screenpop Node
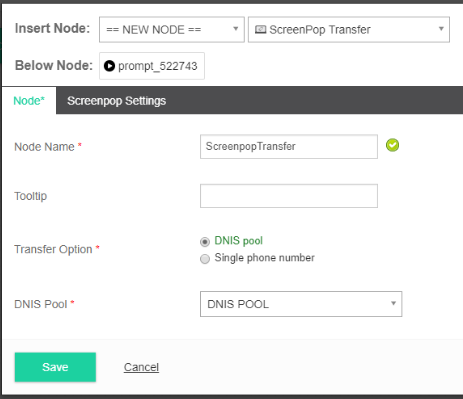
- The screen pop transfer node is grouped under the Transfer category. Drag and drop the node in your call flow where you would like to transfer the call.
- In the Node tab, provide a new Node Name.
- Choose which transfer method you would like to use - to transfer using DNIS pool option choose “DNIS Pool” as the transfer option and then select the DNIS pool that you want to use.
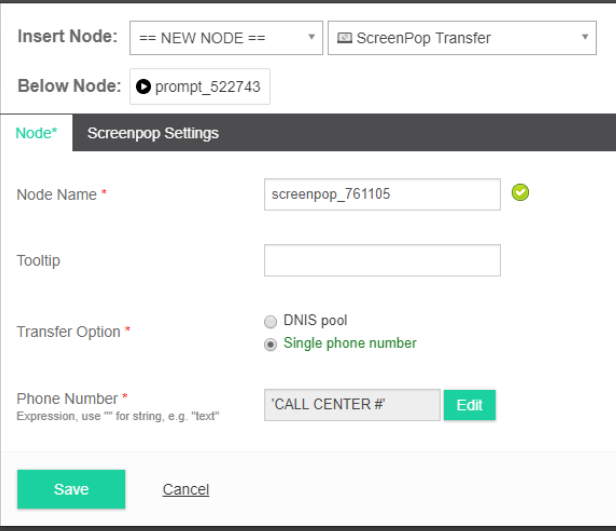
- If you are transferring using just the ANI select Single phone number and enter the call centernumber in the Phone number field. The Phone Number field supports the use of variables.
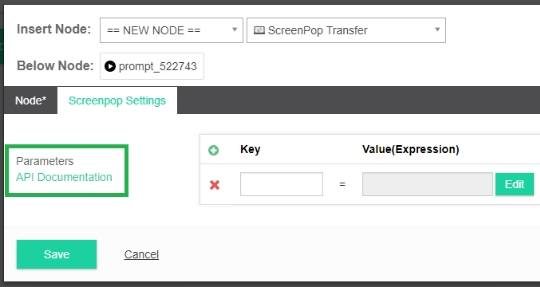
- Under the Screenpop settings tab add the parameters you would like to forward - this is the data you are selecting to forward to the call center. Examples of these could include the customer details from your CRM or previous responses to this conversation. The information is sent as key-value pairs. You can also provide a Display Label for each parameter which is how each parameter will be titled when the data is populated.
- Under API Documentation you can find examples for all 3 API URLs. You need to configure one of the URLs within your call center agent software.
- Click Save.
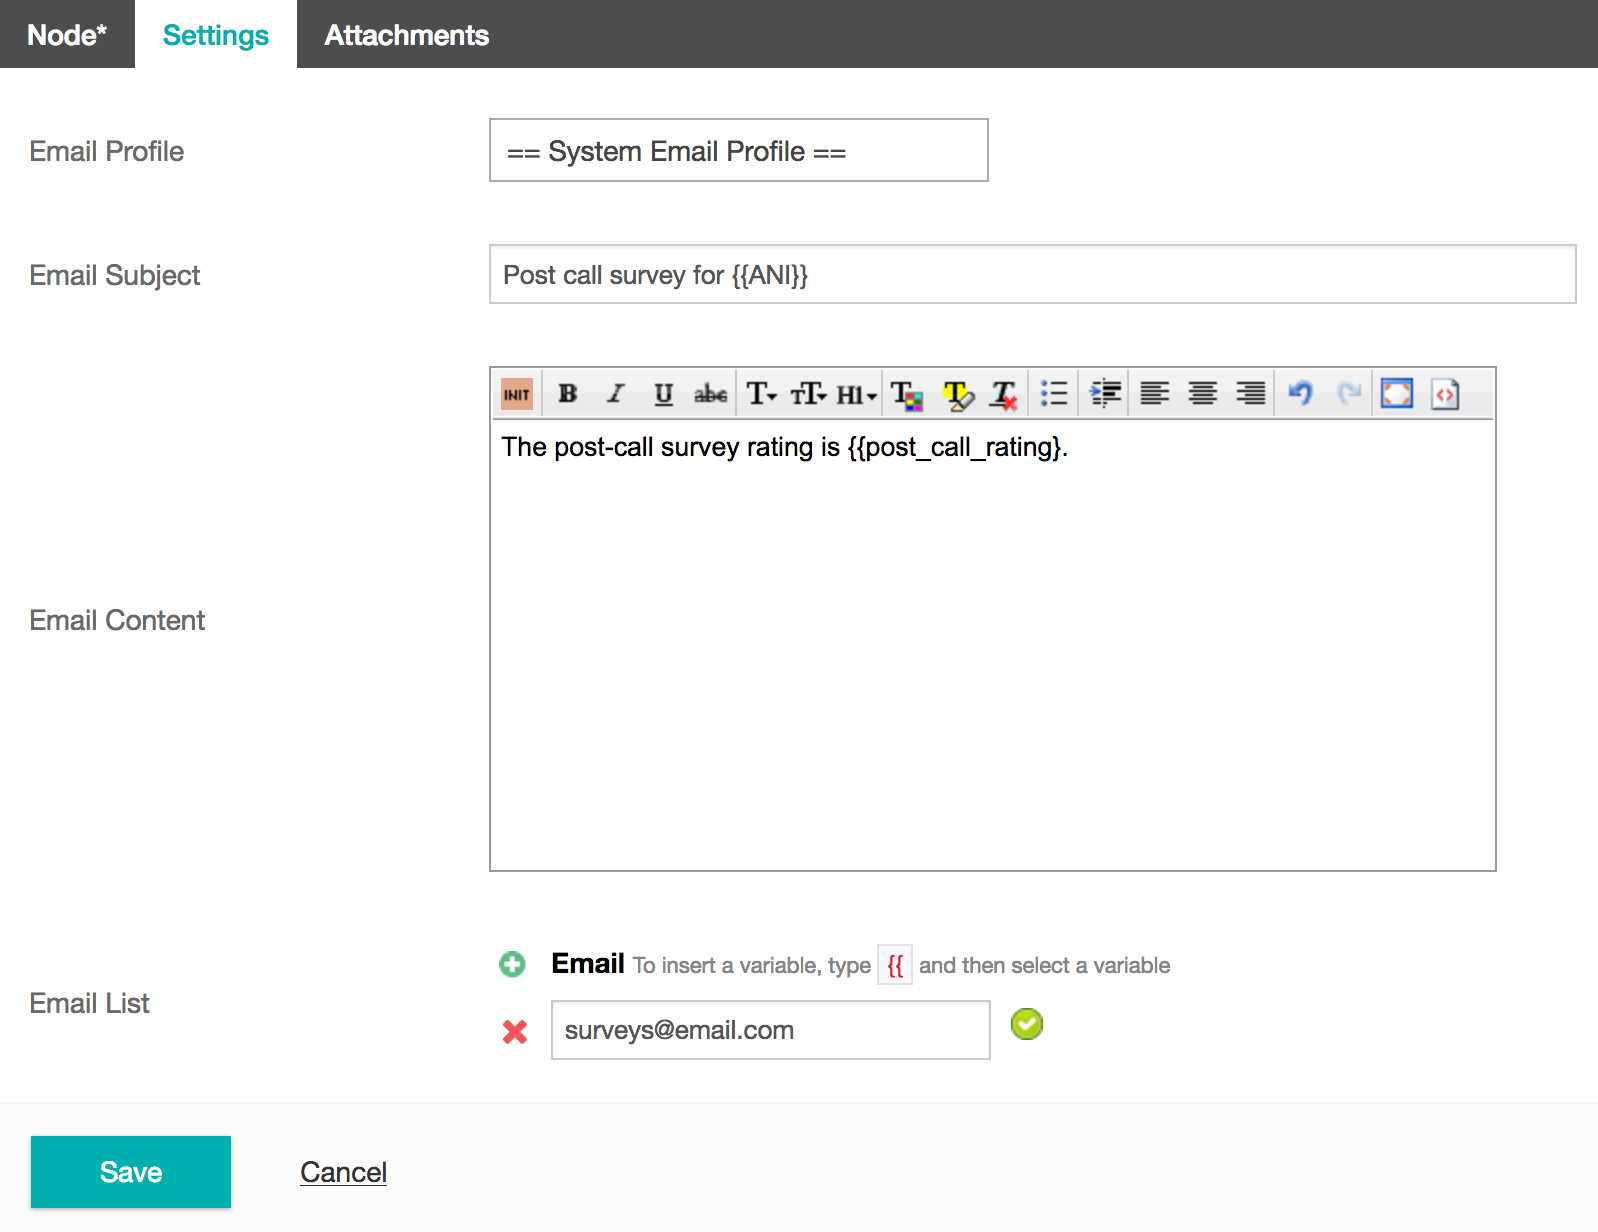
Send Email
The Send Email node allows you to send an email at any point in your task. The example we will use is that we want to send an email to our sales team with the results of a post call survey.
TIP
Before you can use the Send Email node you will need to have an email profile set up.
- From the Node tab, provide a new Node Name. We will call ours post_call_survey_email.
- From the Settings tab, select your Email Profile. We will use our system default profile.
- Provide an Email Subject. If you want to use dynamic content for the email subject you can insert variables via the
{{operator and selecting the variable. We will give our email the subject: Post call survey for service number {{ANI}} (The ANI variable is the current caller's phone number.) - Enter content for your email. If you want to use dynamic content for the email content you can insert variables by selecting the Insert Variable button, and selecting the variable you wish to use. We will use the email content, The post call survey rating is {{ post_call_rating }}. (The post_call_rating variable is the survey rating the caller has provided between 1 and 5.)
- Under the Email List section, provide the email address you want the email sent to. Additional emails can be added by selecting the + icon. We will have our emails sent to surveys@email.com
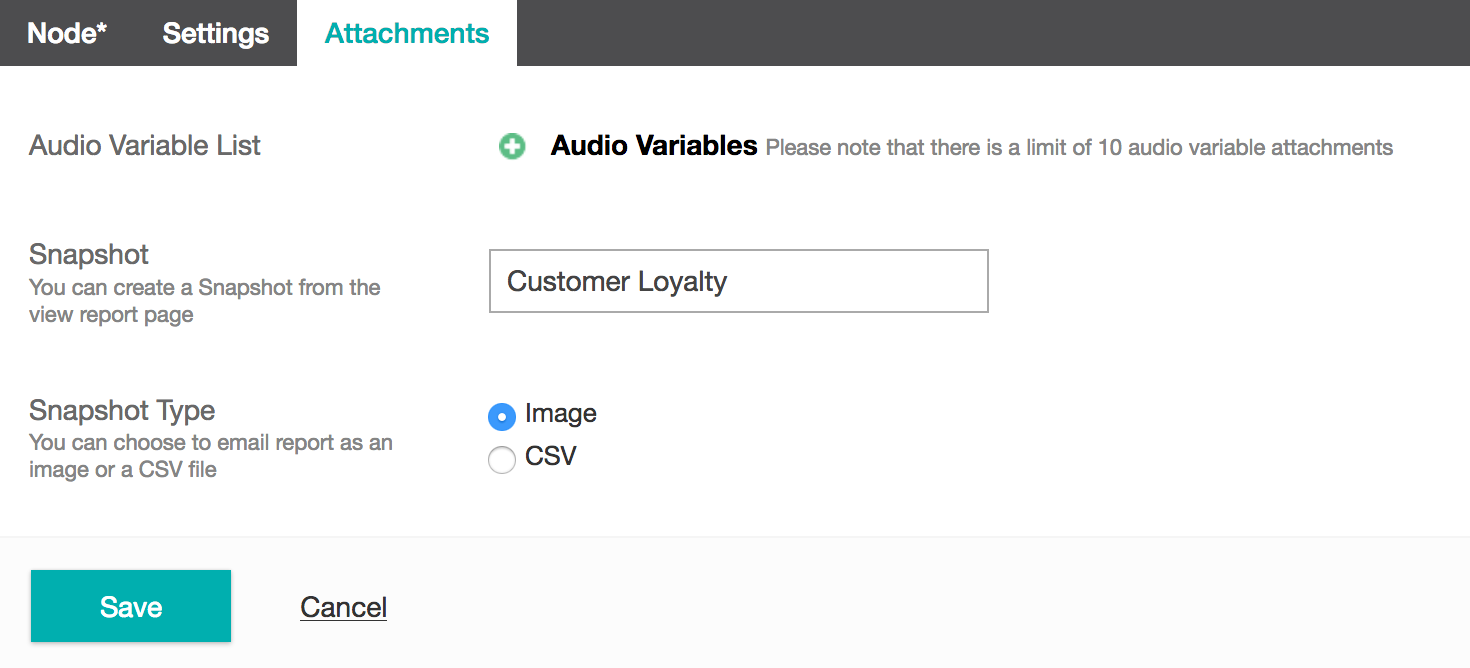
- To include attachments to your email select the Attachments tab.
- You can attach Audio Variables by selecting the + icon.
- You can also attach a report Snapshot as either an image or CSV file. Learn more about creating Snapshots.
- Select Save.
Send SMS
For this example let's suppose we have created a task where Bob the friendly coworker can provide a link to the Inference Documentation Center via SMS. In this case, Bob would send an SMS message with another coworker's phone number as the text message content. The task would then extract the coworker's phone number and text them to let them know that Bob thought they might need some help, as well as provide the URL to the Inference documentation center. The task would then reply to Bob to let them know his message had been sent.
- From the Node tab, provide a Node Name.
- Select the Settings tab.
- From the Settings tab fill in the SMS Content text box. You can also insert variables inside the SMS Content box by typing the double curly brace
{{. - Complete the SMS receiver field. This is where the SMS will be sent to and can contain either a direct number or a variable by typing the double curly brace
{{. - You also have the option of receiving delivery notifications for your SMS. This feature requires you to host a webservice to receive the notifications events. To use this feature, click on the "Delivery Notification" tab.
- Enter the URL for your webservice in the Web Hook URL field. All notification events related to this SMS will be sent to that URL.
- You can pass additional parameters using the Query Params field to differentiate between the different messages that you send. These parameters will be included with the notification events.
- Select Save.
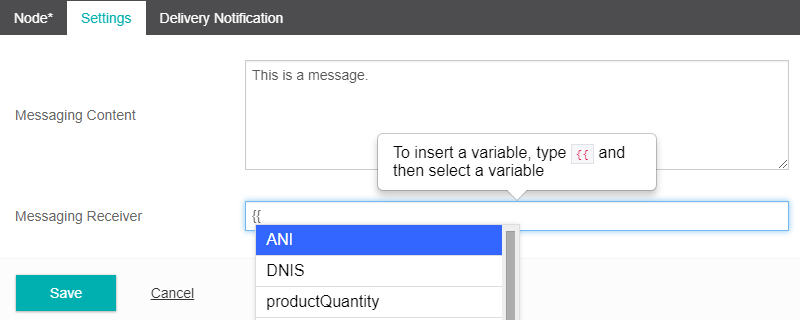
Set Voice
The Set Voice node switches TTS prompts from one voice to another e.g. from Male to Female or English to Mandarin. Once a set voice node has been created, everything below this node in the task will adopt the voice selected.
- Assign a Node Name.
- Select the Language using the Language drop-down menu.
- Select the voice using the TTS Voice drop-down menu.
- Select Save.
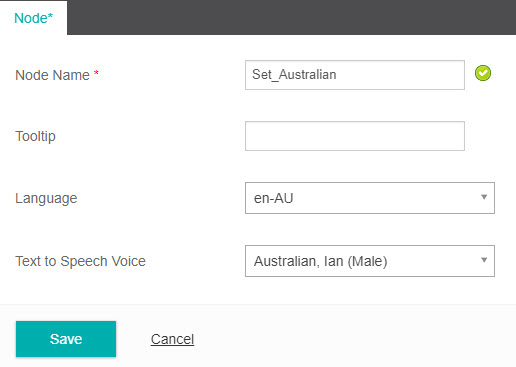
Sleep
The Sleep node is automatically added to the end of a Workflow. It allows the Workflow to end once it has executed. The workflow will then continue to execute based on the schedule that has been set for it.
- Under the Node tab, provide a new Node Name.
- Select Save.
Table Lookup
The Table Lookup node allows you retrieve data from either a Table or Data Store. This data can be provided by a raw data CSV file, pulled in via an API, or from data collected by the studio platform itself. This data can then be used in your callflow.
This Node is really helpful to use the data you already have to increase call efficiencies and personalize the customer experience.
This node works with boh the Table function and the Data Store function.
TIP
If you have not yet created a Data Store or Table you will need to do this before using the Table Lookup.
- From the Node tab, assign a new Node Name.
- From the Settings tab, make a selection from the Select a Table dropdown menu.
- Once you have selected a Table/Data Store, you will be able to view the data columns for that dataset.
- Under the Query Conditions section, you will need to provide a data Column and Value to be queried. This uses the Expression Builder, so the Value can be any type of condition or logic. For example if the key identifying variable you want to find the data for is a name, you would select the 'name' column from the data store. You can also add additional values to pull by selecting the green + icon.
- Under the Order by Column section, you can select a column from the dropdown menu and an Ascending or Descending option to sort the results.
- Under the Assign values to variables section you can assign the returned data to a variable in your task. This allows you to then use this data as a variable in your callflow. An example of this might be to forward the customers phone number to a sales representative.
- Select Save.
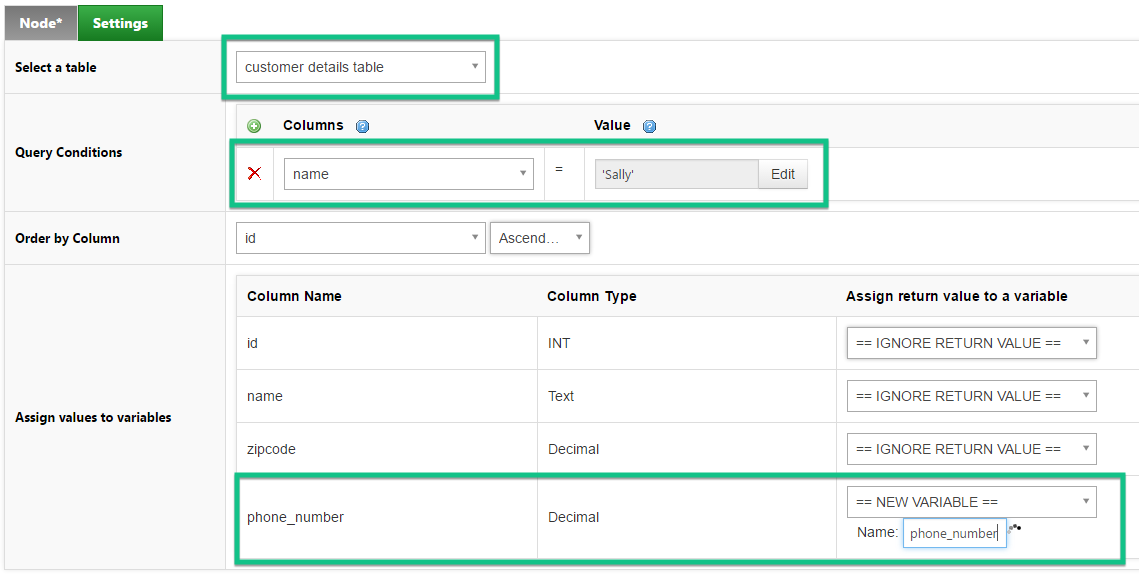
Tone Analyzer
Studio 6.0
Tone Analyzer is available in Studio 6.0+The Tone Analyzer node is built upon the IBM Watson Tone Analyzer. The Tone Analyzer node works but converting a caller's audio response into text, which is then analyzed for specific emotions. This allows you to direct the callflow based on the callers perceived emotions e.g. send them directly to an operator if they appear angry.
To use the Tone Analyzer you will need to save a callers response into a variable before it can then be analyzed. In this example we will use the Google Cloud Speech-to-Text and save the callers response into a variable called CaptureIntent.
- In the Tone Analyzer node provide a Node Name.
- From the Text Detail tab, click the Select Text dropdown and select the variable which contains the callers response. In this example we will selelct the CaptureIntent variable.
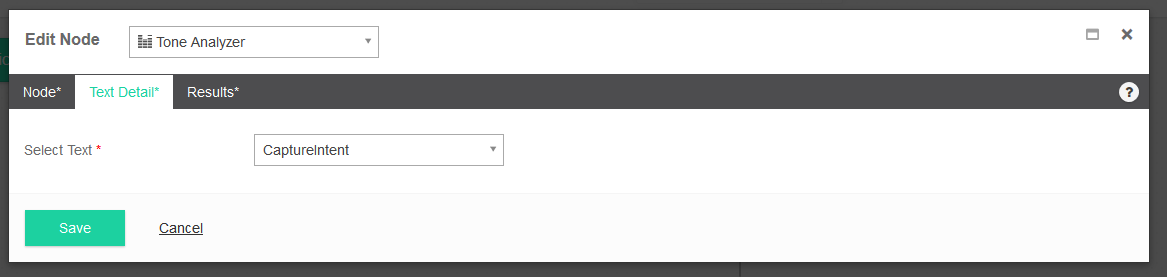
- Click the Results tab and from the Result Array dropdown select either an existing or new array. We will select a new array called emotion_array.
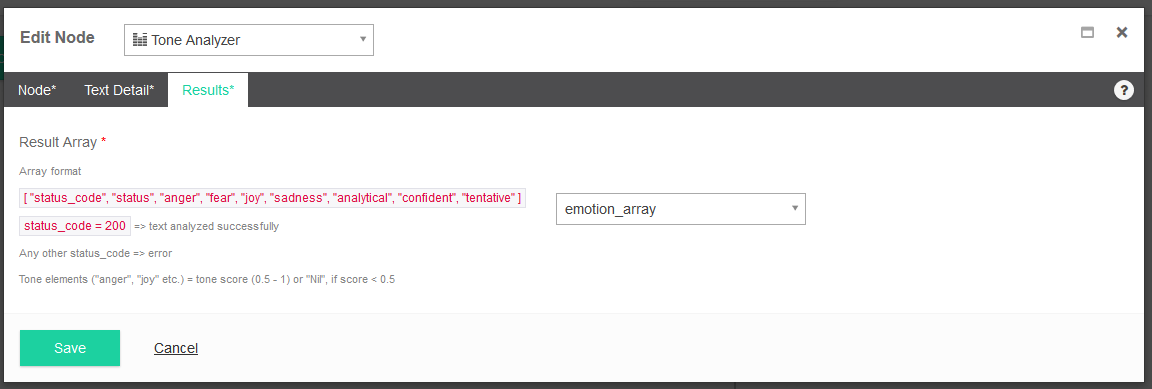
- Click Save.
Now that the responses are being stored in the emotion_array we could use a Decision node to direct the caller down any number of paths based on their perceived emotions.
TIP
The Tone Analyzer node will always return data as an array that contains which emotions were deteced as well as the confidence scores relating to this detection. Confidence is measure as a percentage in decimal format between 0.0 and 1.0
e.g. anger with a confidence score of 0.8 (80%)
Transfer
The transfer node allows you to transfer a call to any valid telephone number. Normally, the call is immediately transfered and the caller will hear any post-dial delay, [custom] ringback and or network treatment or busy message returned by the transfer destination (blind transfer). The task will then complete. If either or both custom ANI or Display Name are set, this behaviour is altered, and the script will only transfer to a destination once it connects.
- From the Node tab, assign a new Node Name.
- Under the Phone Number section you can provide a phone number or retrieve it from a stored variable via the Expression Builder. We will transfer our call to the number 04085555.
- From the Settings tab you are able to assign a custom ANI and Display Name. When either or both ANI or Display Name modification is set, Studio will establish a new call leg to the from the transfering script to the destination before connecting the transferee (an very brief consultation transfer). An event handler must be set to allow it to trigger if the new call leg is not answered or is busy then an Event Handler will trigger.
- If using ANI or Display Name override, under the Event Handlers tab, provide an event handler from the dropdown menu. You can also create a new event handler by selecting == NEW EVENT HANDLER ==, and providing a new event handler name. An event handler is required where ANI or Display Name override is used. You can ignore this otherwise, and where override is not set, transfers to busy or unavailable destinations will complete successfully from the tasks point of view.
- Select Save.
TIP
The ANI modification feature is network dependent. Please consult your service provider for additional information. You may be limited particularly in your ability to provide an ANI that is not associated with your service.
Upon transfer, the task exits. There is no processing of the Disconnect handler as that only fires on caller initiated disconnect.
Trigger Campaign
The Trigger Campaign node allows your task to make outgoing calls via an On-Demand Campaign. You will need to make sure you have already set up a campaign for the Trigger Campaign node to work.
- From the Name tab, provide a new Node Name.
- From the Settings Tab, select which On-Demand Campaign you would like the node to use, from the dropdown menu.
- Select Save.
Variable
The variable node allows you to create a variable and assign a value to it. You can also create a variable with an empty value - the value can then be modified during a call flow. Variables created inside the Variable Node are classed as a local variables i.e. they are only available from within the current task.
- From the Node tab, provide a new Node Name.
- From the Settings tab, you can Assign values to variables. From the Select variable section you can select a pre-existing variable from the dropdown menu or select ==NEW VARIABLE==.
- If you are creating a new variable you will also need to provide a variable name.
- From the Variable Value section you can assign a value to either the new or pre-existing variable.
- If you wish to create and/or assign values to multiple variables within the same node, you can add additional variables by selecting the green + icon.
- Select Save.
TIP
The variable node can be used in conjunction with Application Variables. Once an Application level variable has been created it can be accessed by any task in the account.
When should I use an Application Variable?
Application Variables (often referred to as global variables) are used to store dynamic or static data which can be accessed by any task in your application. They differ from Task Variables in that they can be used by multiple scripts without the need to create them for each task.
Application Variables are helpful when you have information that you would like to be able to re-use within multiple scripts. They are also helpful in that they can be assigned a default value, rather than only having a value passed to them during a callflow.
TIP
Inference Studio has the following reserved variables: UUID: the unique ID of the call. DNIS: Dialed Number Identification Service (i.e. the task's service number). ANI: the number of the caller.